

How (not) to build an app with Appy Pie
There’s something to be said about making something yourself, whether it be a meal or a piece of art. There’s nothing like coming up with an idea and executing it from inception to completion, all on your own.
For the self-driven individual, an app WYSIWYG (What You See Is What You Get) editor sounds like a dream – they can work pretty well for websites, so why not apps? Wouldn’t it be cheaper to make it on your own anyway?
It makes sense that a service like Appy Pie would be tempting for any appreneur with an eye for design and a small budget – or maybe a CTO in the same situation. But – and this is my honest opinion – I think it would be easier to design an app in Sketch, prototype it in Invision, teach yourself Swift, and build in Xcode, than it would be to create a successful app using a service like Appy Pie.
I have come to form this opinion because I tried to make an app using Appy Pie. I originally intended this to be a fairly benign chapter of our How to Build a Mobile App: The Ultimate Guide, detailing the best options to use and a short how-to guide for the appreneur who does not have the funding to hire an app developer; but almost as soon as I started testing the user experience of Appy Pie, I knew that wasn’t going to happen.
Because; skipping (for now – I’m going to get to these later) the un-organized creation system, limited options, and inescapable cookie-cutter feel – it’s not you making your app. It’s Appy Pie.
Now, I feel like I need to put a little disclaimer before we go any further; I don’t hate you, Appy Pie. This isn’t a vendetta against you personally. It’s just WYSIWYG doesn’t work with app creation. This isn’t even really about Appy Pie – it’s about any service that provides a way to make apps without coding them.
Making an app with Appy Pie
At first, I was intrigued. “Create an app for free in 3 easy steps? That sounds awesome!” I was interested in how it would work; I had built a website that didn’t need to accomplish much using a WYSIWYG creator in my first year of exploring web dev, and it had honestly taught me a few things, and the site really wasn’t half bad (for what it was intended to do). So, I had hope that there would be an equivalent for apps..
What I’m trying to say, is that I went into this with an open mind; I didn’t intend to write a piece touting the benefits of hiring a mobile developer over using a service like Appy Pie. It’s just how it naturally transpired.
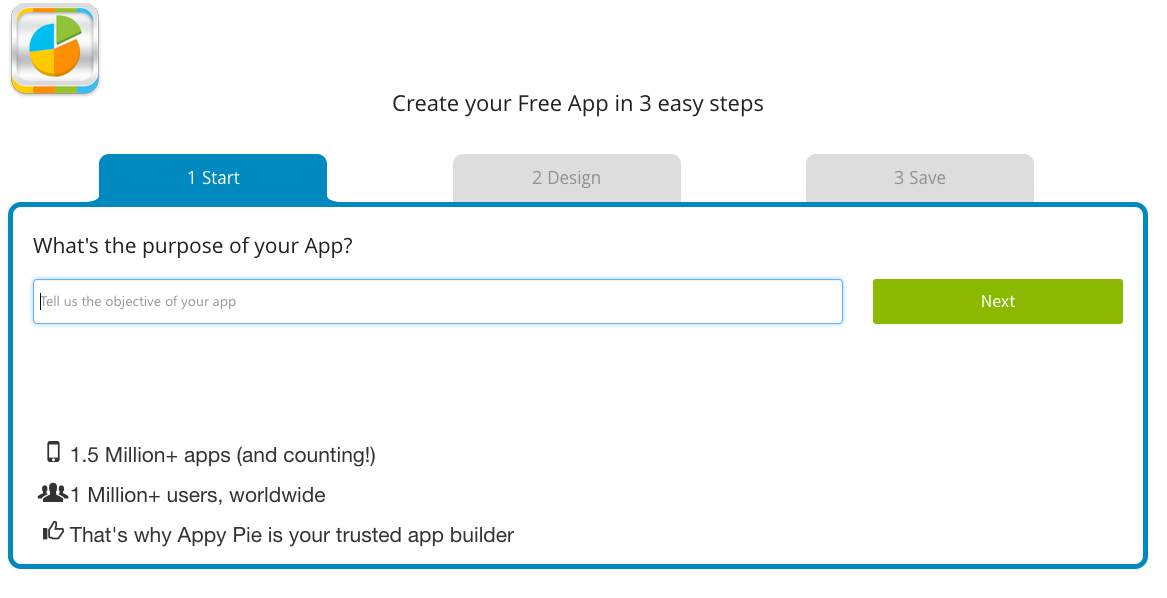
One of the first questions Apps Pie asks is on point: What’s the purpose of your app? As we’ve gone over in the past, knowing the purpose of your app is one of the most important questions to answer before doing anything else. At this point, I was hopeful.
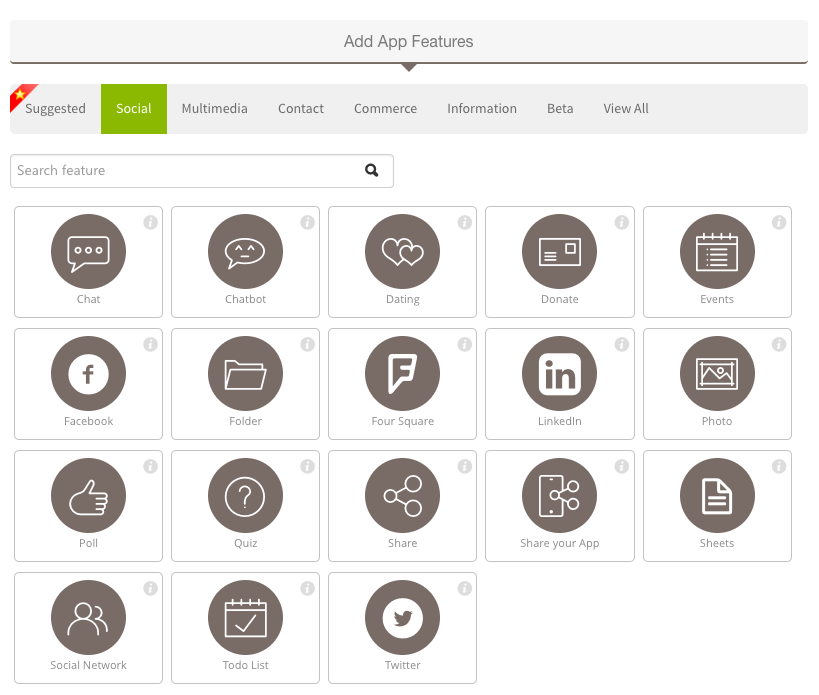
And then came “Step 2.”
This is where it all starts to fall apart. The above screenshot is what you’re greeted with, and while Appy Pie’s UI is pretty straightforward to navigate, I found it extremely difficult to visualize what I was creating. Now, not every app developer has the same process, but a simplified overview usually looks like this:
- Designing the UI in Sketch
- Planning the flow in Invision
- And then coding based upon the Invision file
Appy Pie seems to take this process and condense it into one step. While this may seem like the service has just streamlined the app building process, they’ve instead muddied the waters. There’s a lot to keep track of when planning and building an app, and one scrollable list isn’t the most efficient way to go about it.
Take, for instance, what an app’s UI design looks like in Sketch:
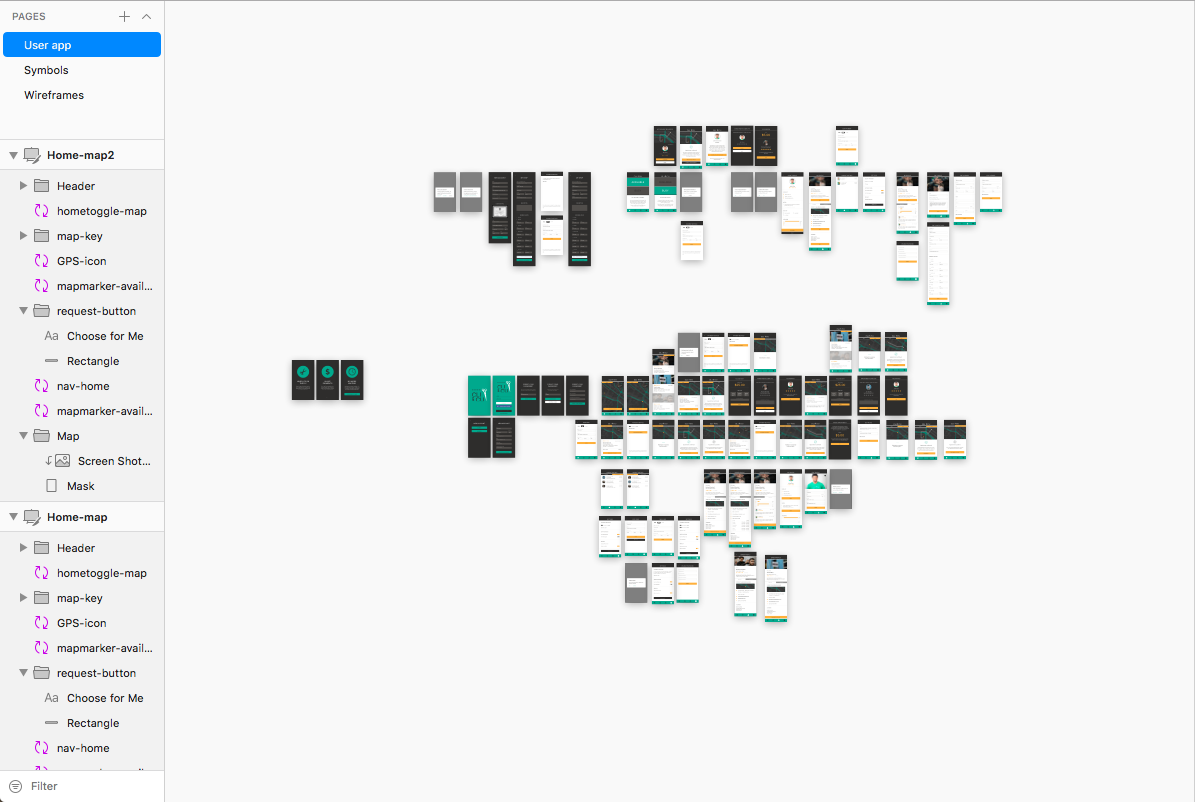
Every rectangle you see above is the design for each screen of a single app. These screens are then put into Invision and linked together to plan out the app’s flow and UX. During the design and prototyping phase, our UI/UX team gets into the nitty gritty details of each screen, working in tandem with our programmers to determine everything from screen transitions to the exact pixel dimensions for each button, field, and image.
Our developers can then take the Invision file, and code based on that – providing them with easy access to all the necessary information, from hex colors and fonts to UX and flow.
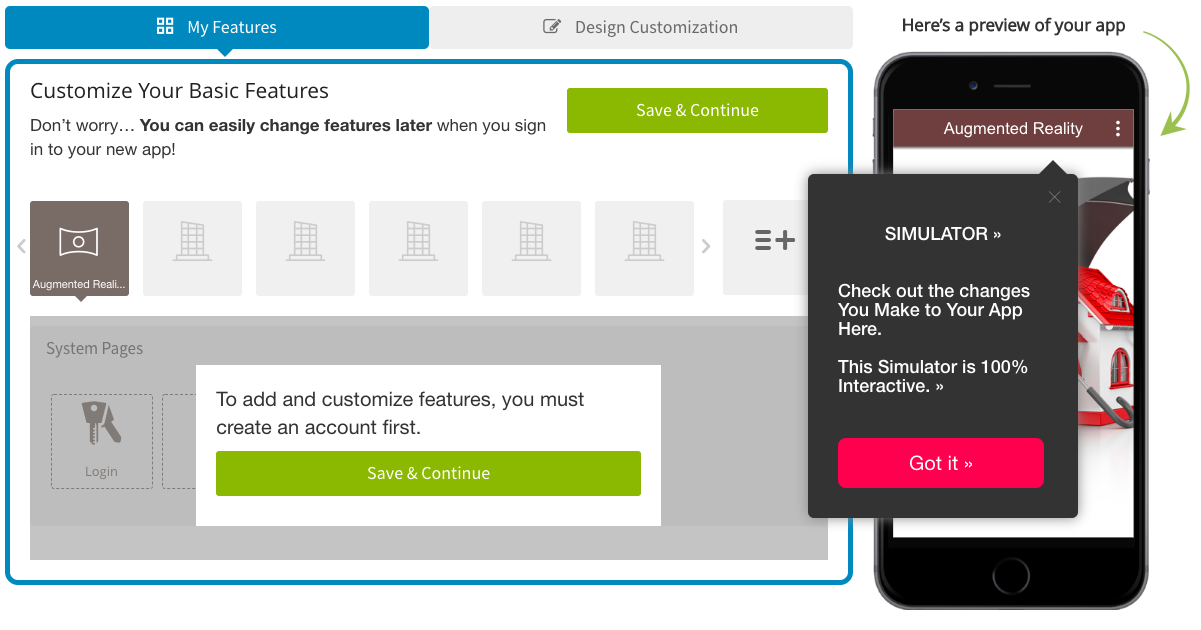
Now, imagine doing all of that, but with this UI acting as your tech doc, your design editor, your prototype, and your code:
Yes, it’s visually simple. But take a look at that Sketch screenshot again. Now imagine bringing that level of detail into a system like Appy Pie’s. This system condenses the intricate and detailed process of creating feature sets, UI/UX design, and app flow into:
- Choose feature
- Design feature
- Choose another feature
- Design that feature
- Repeat ad nauseam
This is a great way to produce an unorganized app. It’s akin to not only building a house without a blueprint – but building a fully functional and furnished kitchen with plumbing, appliances, lighting, table and cabinets, and a coat of paint – and then moving on to the living room’s wooden frame. Doing this, it’s unlikely you’ll build a structurally sound home.
This isn’t even mentioning the cookie-cutter feel this system is sure to produce. Take a look at the options given to you for layout and design:
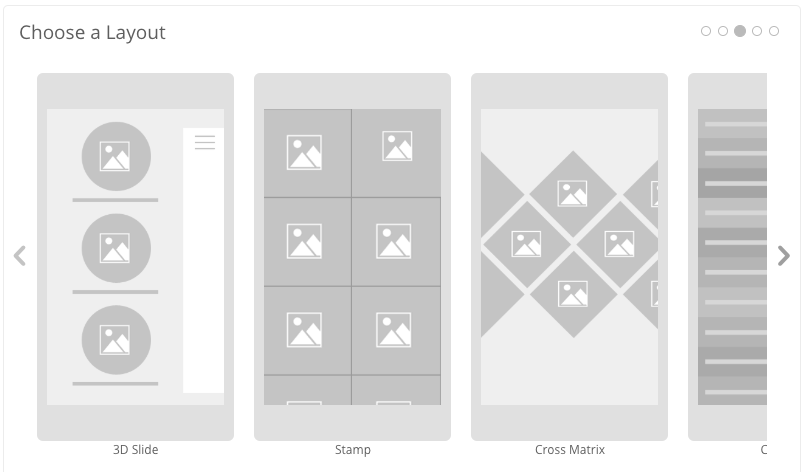
With limited options and methods of implementation, your app is bound to feel just like someone else’s.
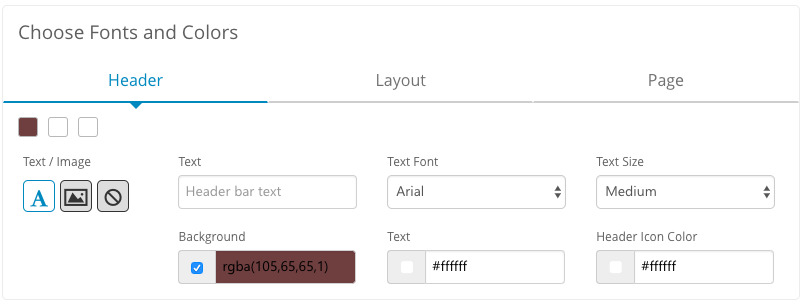
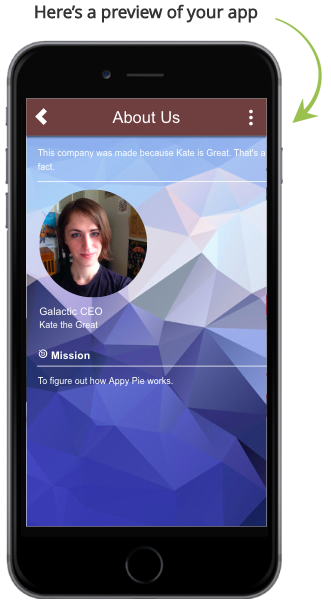
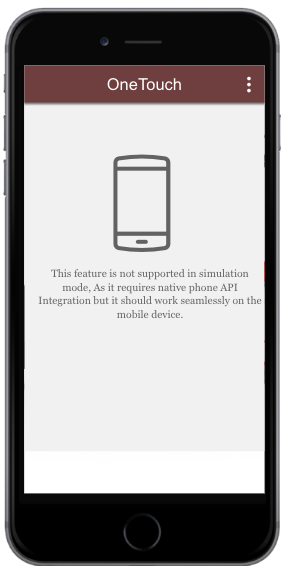
This muddied method for app creation has another negative compounding factor: You don’t know how anything fits together. Sure, “Step 2” has a live preview of each page on the right side of Appy Pie’s UI:
But all too often, I would be met with this message:
Which brings us to development cycles. We’ve covered some dev cycles before, but overall, most developers will use what’s called agile. Basically, the steps to an agile development cycle are as follows:
- Identify and set goal for issue
- Work on issue
- Meet up after a set amount of time to discuss and test process on issue
- Iterate until complete
This process can take anywhere from a day to two weeks, and it largely depends on the developer – but (and this is a very important but) – each issue (another word for feature) is tested independently before it’s implemented. This is because (as we’ve covered in our Swift development piece) programmers will build their code in a branch, test that branch independently from the rest of the code, debug, and then merge their branch with the master branch.
This serves two very important functions: compartmentalizing bugs, and reducing the risk to the overall codebase. It’s much simpler to look over 100 lines of code and find the problem with your app than it is to look over 10,000 lines. By testing each feature by itself, developers are able to cut down on overall time spent testing the app – measure twice, cut once.
And this is where things really start to go downhill. I had made a gallery linked to my Flickr account, and I wanted to test it on a phone to see what it would actually be like to use this app on a device. So, I downloaded the app, and this is what I saw:
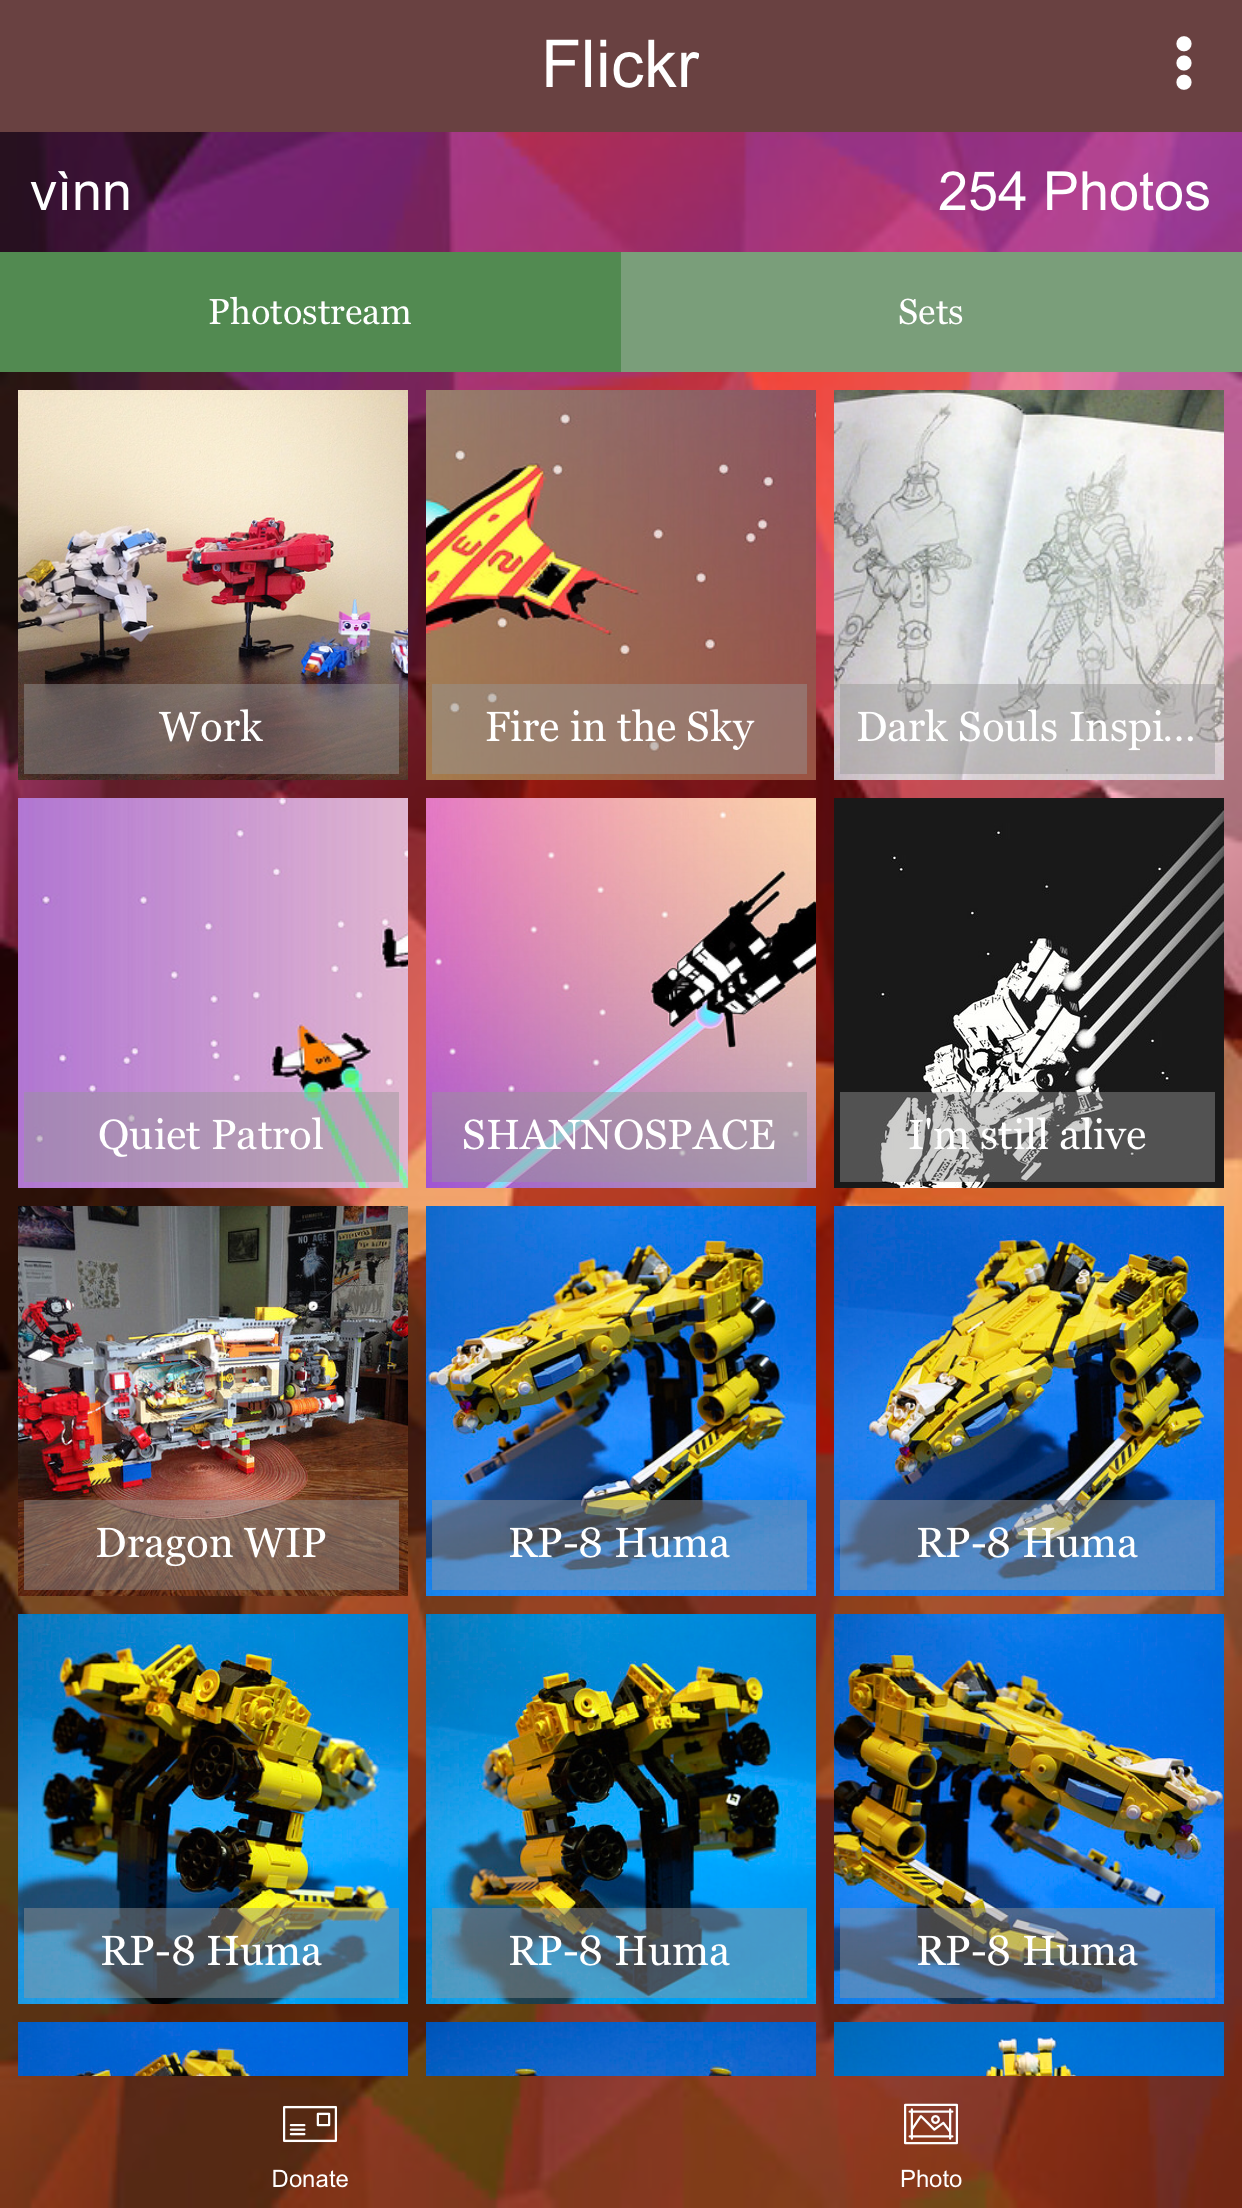
Honestly, not bad. All the work I had to do was select the grid layout, and I had played around a bit with some of Appy Pie’s default backgrounds. The scrolling, albeit a little janky, worked, and switching between the “Donate” and “Photo” bottom menu options worked. There were a few problems though – scrolling just stopped loading new images after a certain point, and I wanted to take away the “Sets” tab, along with changing the typeface the gallery used.
So, I set those as goals to fix – much in the same way developers will test, find a bug, and fix it. I went back into Appy Pie to edit the gallery, and I was met with this:
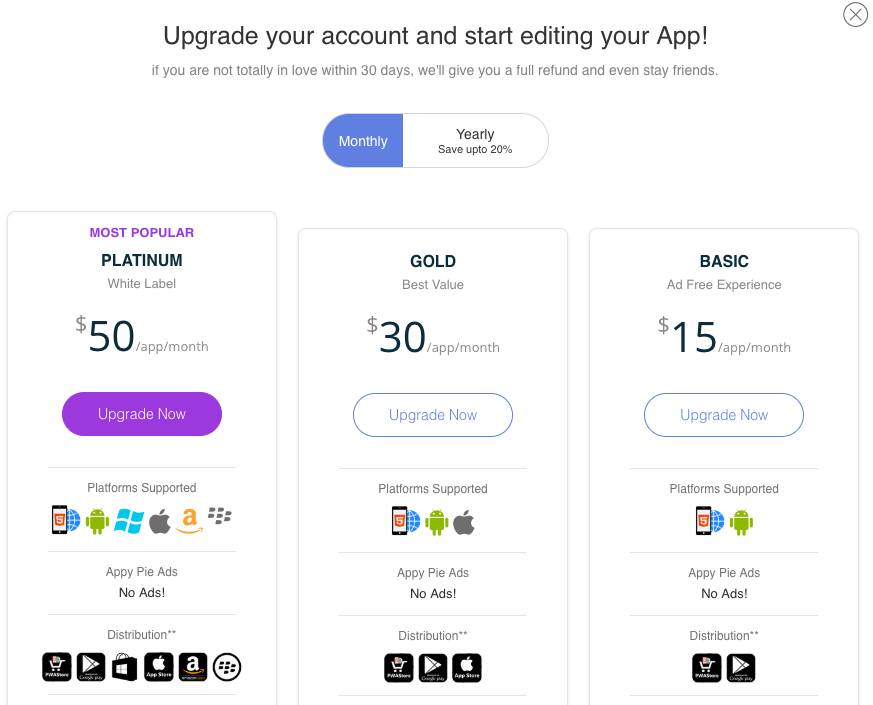
I couldn’t edit. I had downloaded the app to a device in order to test a feature set, and I couldn’t make changes (not until I paid, at least) based on my findings from testing.
How to make an app with Appy Pie: v1.1
With this newfound information, I present the fool-proof guide on how to make an app in Appy Pie “for free in 3 easy steps”:
- Make an Appy Pie account
- Design, plan, and implement your entire app all at once (perfectly too, no testing allowed)
- Publish your app
It’s just that easy!
When I started researching Appy Pie’s service, I really didn’t expect to end up writing something with as much snark – but my plan was forced to change. I tested an outline against my actual experience, found they didn’t work together, and then edited the outline to make it fit with what actually happened. A process Appy Pie can’t seem to replicate – for free, at least.
There’s so much more to a successful app than just making it too; ASO is a huge factor for your app’s success. For any sort of analytics, you’re paying $50 per month per app, and that app can only be stored on a maximum of 600 MB of space.
There are entire companies dedicated to analytics and building keyword campaigns for apps, and when you build an app with Appy Pie, you’re expected to do all of it yourself, while paying a platform for allowing you to do so.
If you’re a self-driven individual set on making your own app, we think that’s great. Our senior Swift developer is self-taught, and we believe some of the best coders come from the evolution of hobbyist to professional – but keep in mind, if a service’s “Create an app for free in 3 easy steps” claim seems a little too good to be true, that’s because, more than likely, it is.


Leave a Reply
Want to join the discussion?Feel free to contribute!