

How to build a mobile app: App lifecycle Management
App lifecycle management, which we’ll be referring to as ALM from now on, is the totality of managing the processes, systems, and people that make your app: market research, ideation, coding and design, testing, launch, analytics, and updating your app throughout its time on the App Store or Google Play.
Let’s explore ALM:
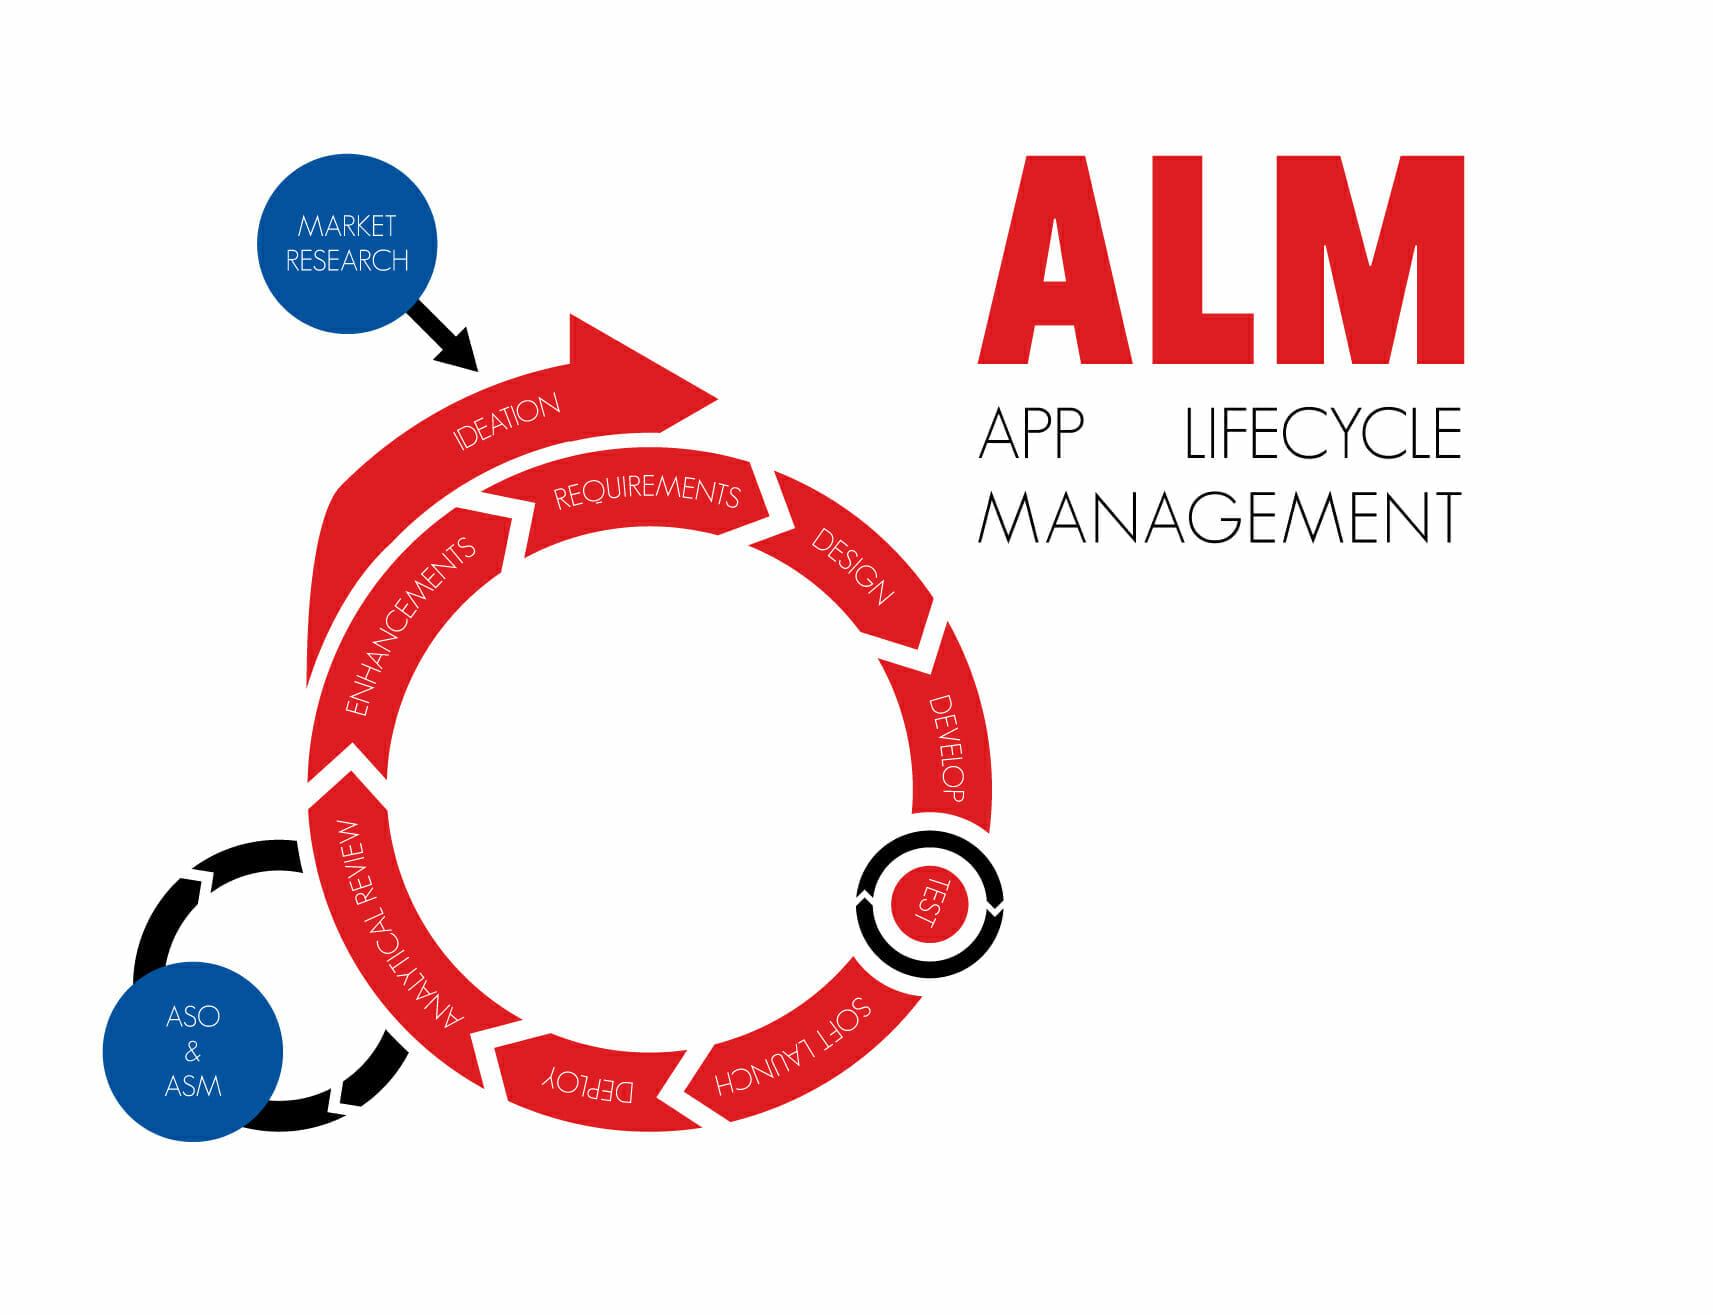
Step 1: Ideation
There’s two ways ideation can come about; from inspiration after being presented with a pain point in your own life, or from conducting market research which exposes a niche market with an unsolved pain point of their own. If it’s the former, make sure to conduct your own market research to determine just who exactly your niche is.
If you’re looking for ideas and methods for coming up with marketable apps, visit our blog on the topic.
Step 2: Requirements gathering
After solidifying your concept, you’ll want to develop out the requirements of your app – basically, what it does and how you want it to achieve those things. This covers everything from your app’s feature set to the SDKs and APIs it utilizes. Then, break those down sets and systems into individual, detailed tasks, so you and your PM can easily manage and track the progress of these tasks.
Your feature set will be based upon user stories. User stories are detailed, step-by-step use cases of what a user will do during a session in your app in order to accomplish solving your pain point.
You’ll also want to plan out which platform(s) your app will launch on, if you haven’t already. This should be partly influenced by your market research. Knowing which platform you’re building for will dictate every following step – and if you are building both an Android and iOS app version, you’ll need two dedicated development teams.
If you’re looking for more info about planning your app’s feature set, visit our blog covering the topic.
Step 3: Design
When you have a plan solidified for what your app will actually do, you can move onto design. Start with wireframes and color options on your home screen, and after settling on the right layout for your app, begin designing the other screens and how your users will actually interact with the functionality your app provides.
If your app has graphics, this is the step you’ll implement those – anything visual that your app requires should be complete before coding begins (if your app requires heavy backend infrastructure, start building that out as soon as possible). Make sure to build out a prototype so your software engineers have something to reference while they code.
For more information about proper app design methods, visit our blog covering the topic.
Step 4: Develop
This is where the actual coding begins. Your programmers should build the UI based on the prototype to ensure all of the requirements are met. Assign those requirements, incidents, and tasks to your team. For every incident that is completed, run tests to check for errors and vulnerabilities. After that iteration has passed a code review, add it on to your master branch.
For a lot more tips on avoiding development mistakes, visit our blog about common development pitfalls. For a guide covering iOS development, click here. For a guide on Android app development, click here.
Step 5: Testing
Create your test cases, which should be based on the user stories you came up with during step 2, requirements gathering. To efficiently test, lay out every step of your user stories in a spreadsheet, and identify the features that aren’t working properly. Take the time to make sure your app feels smooth and attentive to inputs as well. Users are likely to abandon slow apps in favor of faster ones.
Record every bug you discover while testing. Fix the issues, and test again. Repeat this step until testing is complete.
Step 6: Soft launch (quality assurance)
Sometimes referred to as a beta test, your soft launch will open up your app to a small segment of the public – one that you, or a marketing agency (or your developer) will find. They’ll use your app out in the field, so to speak. A soft launch can be thought of as the second step of testing, because it will inevitably uncover bugs and errors your first rounds of testing didn’t.
Optimally, you’ll have caught most of the bugs by this point, so your testers will have a high opinion about your app before it’s published (which gives you a significant boost to your app store rankings when they rate it after launch). They won’t be surprised, however, if they do find bugs – they understand that it’s a soft launch, after all.
You’ll bounce between steps five and six until all of your app’s bugs have been identified, fixed, and tested again. For more information and tips about running a beta test, visit our blog covering the topic.
Step 7: Deploy
Congratulations! It’s time to publish your app. Both the App Store and Google Play have different approval processes and standards for apps to pass before they can be published, as well as publishing fees.
If you’re looking for more information about the cost of publishing an app (and the other costs associated with development) visit our blog covering the topic. If you need help planning out your ASO campaign (which you should do before launch), visit our blog on the topic.
Step 8: Analytical review
Now it’s time to watch (and then react to) the data coming in. There are a lot of app analytics platforms, but we prefer Kumulos.
For a step-by-step, detailed guide to measuring your app’s success, visit our blog about measuring your app’s analytics.
For more information about coming up with ASO strategies, visit our blog on the topic.
Step 9: Enhancements
Based off of your analytics, it’s time to start updating your app with enhancements; enhancing your app’s UX by updating it’s design, security, and compatibility with other devices.
This is the step that glues the whole process together, and based upon the analytical data you’re receiving, you’ll ideate solutions for the aspects of your app that need to be enhanced.
The effects of not updating your app
Updating your app is the most important step you can take to ensure the time you spent developing your app (which in some cases can take years) doesn’t go to waste.
Updating your app is important for the following reasons:
App Trends
What’s cool is always changing, along with what’s possible. Updating how a feature looks or functions almost invariably results in a positive boost to your users’ experience using your app, which in turn leads to higher user retention, ratings, and reviews. Your update doesn’t always have to be centered around functionality either – sometimes it can be as simple as a background color change, which could be part of an A/B test you’re running.
Security
We all know there’s always someone looking for a vulnerability to exploit. Code that was once air-tight slowly loses it’s edge with time, and the longer your app goes without a security update, the more likely it is that someone with ill intentions will use that to their advantage.
This is an exceedingly important aspect to consider when updating your app. If a user is ever exposed to any security risk due to your app, they are virtually guaranteed to at least stop using your app, and are more likely to outright delete it from their device.
They’ll also be much more likely to give your app a bad review and rating, which can cause a huge dip in your conversion rates as your app plummets in its rankings on the App Store and Google Play. This can very quickly spiral into a downward trend that will be out of your control. Users who feel violated by your app will be sure to warn others about an app that is a security risk.
Bug Fixing
Even when you’ve tested your app throughly as outlined in the steps above, you’re bound to see bugs in your app over time. A major cause of these bugs popping up throughout the lifecycle of your app are due to new devices and updates to the OS your app runs on. As screen resolutions change, so to must your app – or at least, account for those changes.
In the same vein as security issues, bugs will also deter users from continuing to use your app. If you don’t care enough to update it, why should they care to use it?


Leave a Reply
Want to join the discussion?Feel free to contribute!