How to build a mobile app: App design

What makes a well-designed app? Is it the colors? The layout? The icons? The flow?

It’s simultaneously none and all of these things combined – and a whole lot more. In this addition to How to Build a Mobile App: The Ultimate Guide, we’re going to go through – step-by-step – how to properly design an app from the ground up.

Step 1: Find the problem

This might be the hundredth time we’ve stated it in our blog, but knowing your users’ pain point will drive every facet of your app’s development – from the logic in the backend to your color scheme and logo.

This is the most important step to take, as it will dictate everything your app does. When searching for a pain point, ask yourself the following questions:

  • Is this problem specific to my niche?
  • What solution does my niche expect?
  • What steps do they need to take in order to solve the problem?
  • Where does my app fit in those steps?

For example, let’s pretend you want to make an app for gardeners. Great! Now, what niche of gardeners are you attempting to connect with? Gardeners is much too broad of an audience. What about community gardens? Those are pretty big right now. Still too broad. Okay, how about community garden managers? Now there’s an idea.

What kinds of problems do community garden managers face? Are community gardens often managed by one individual, or a team? Is that team made of employees or volunteers?

Narrow your scope as much as you can, and know as much as you can about your audience. Go to a community garden. Get your hands dirty. Figure out what it’s all about, and put yourself in the shoes of a community garden manager. Then, figure out how to make their life easier.

Step 2: Know the problem – and the steps to solve it

Let’s continue to pretend you’re making an app for community garden managers, and the problem you’re planning to solve isn’t (after your extensive research) necessarily gardening related, but rather gardening adjacent. You found that two big issues community food gardens strive to solve are food waste and food deserts – community gardens tend to reach out to, well, the community, in an effort to get them eating healthier, fresher, and more local produce.

The community garden you’ve reached out to specifically wants to have a system put in place that keeps track of their food production, and how much of the food produced is wasted – but their group of volunteers doesn’t have the time to reach out to fifteen, thirty, or one hundred people every week.

So, your plan is to make an app that gives the community garden manager the tools they need to keep track of food production and food waste. But how do you go about doing that?

They have a limited budget, and since they’re volunteers, limited time. Because of this, they need a system that gives them the necessary data to effectively run the garden in the shortest amount of time possible. This is also a two step process – the community garden manager needs to know what’s happening in their garden, as well as what’s happening at their members’ dining room tables.

Your app needs to allow the community manager to collect data from remote locations – the community garden members’ kitchens, as well as the garden itself. So, you now know this app will be designed with two types of users in mind:

  1. The community manager keeping track of the different plots in the garden
  2. and the members who self report on their food consumption

Notice that both of these categories of users are organized by the role they play in solving the main paint point – secondary pain points are solved (like how to share and analyze data remotely) in the process of solving the main pain point – giving the manager the tools they need to adapt with members’ tastes, and grow more food that will actually be eaten.

Everyone’s brains work differently, so we won’t tell you to specifically sketch out your ideas, make wireframes, or write a list of steps users would take. Do whatever works for you – but it’s necessary for you to know the expected steps the people using your app will take. These are called your use case scenarios, or user stories.

So let’s map out the main use case scenario for this app. From now on, for brevity’s sake, we’ll call this app “Growr”:

  1. The community garden manager adds in the current produce to a selectable list on Growr
  2. A community garden member selects the types (and amounts) of produce they brought home from the garden from that list
  3. The member then reports on the types and amounts of produce they actually ate
  4. The data is sent to the community garden manager, who then uses that data to optimize the amounts and types of food grown in the garden

Step 3 – Build your brand

Whether you’re doing it DIY or by partnering with a dev shop, this is the time to figure out what your app is going to look like. By this point, you know the audience you’re trying to connect with, the problem they face, and the steps your app will take to help them solve that problem.

An app’s brand is determined by your audience, and measured by how well it solves their problem – not by its icon in the App Store. But, it doesn’t hurt to make your solution look pretty. This is where you’ll figure out Growr’s color palette, fonts, logo, and icons.

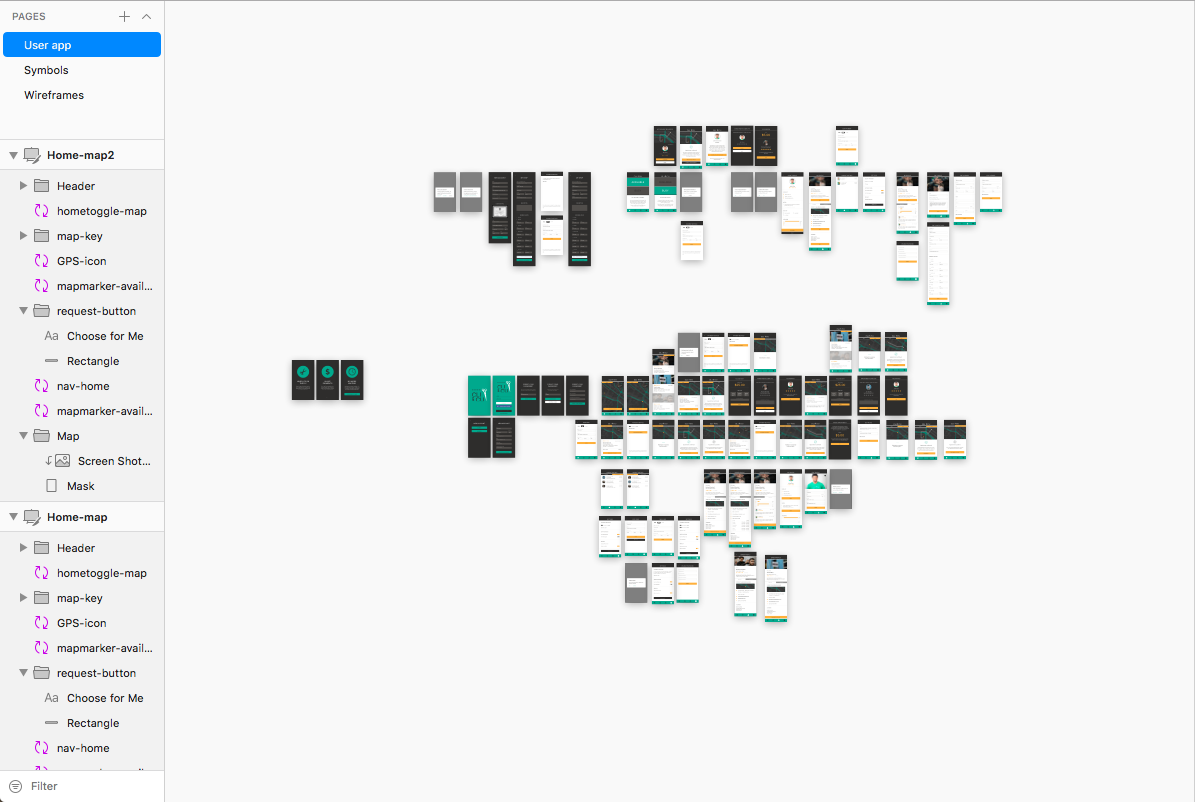
After you’ve created these individual elements that comprise your visual brand, and with a map of your use case scenarios, you can start to layout your app. This is a step in the process where we will advise the use of wireframes – this is to help you get a feel for the flow of your app, and save both time and money.

The next step is to add in all the individual elements you made previously (like the logo, and button styles), and fill in the wireframe layouts with final versions. When that’s done, it’s time to move on to the prototyping phase.

Step 4 – Make it work

You don’t need to know Swift or JAVA – there are plenty of prototyping apps available to use. Before we begin coding, our lead designer will create a prototype of the app in InVision, and we’ll all sit down in our conference room to test the build against the pain point. We get the whole company together for these meetings – the more eyes on your prototype the better.

Doing this will allow you to iron out any bumps in your app’s flow, UX, and design all before writing a single line of code. It will also give you an idea of what your app will really look like when it’s complete – it’s the difference between looking at a photo and watching a video – prototyping your app, while adding another step into the design process, will always give you more information that screenshots of your app’s layout.

After this, your design phase is complete! It’s on to coding for you!

Some other prototyping tools you can use:

Platforms, themes, and user expectations

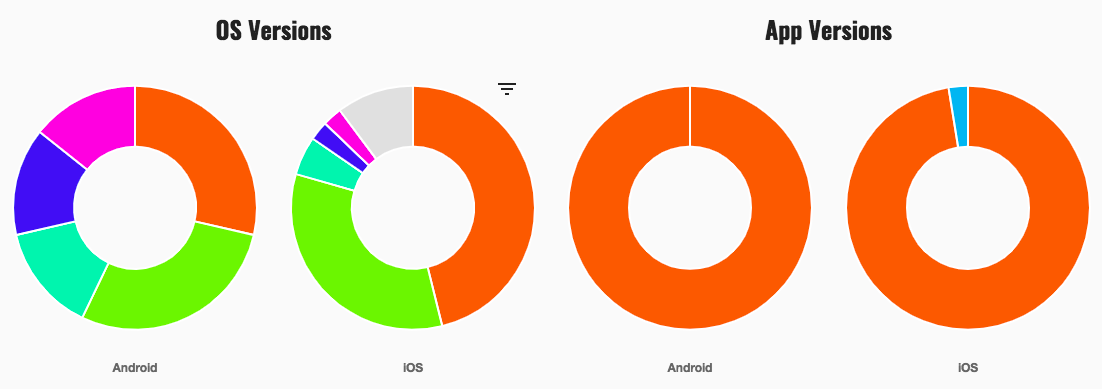
Major decisions about your app’s design will be made by which platform you build your app for – either Android or iOS. Both have different style guidelines, as well as over-arching layout themes. Android and iOS users expect the same functionality to be interacted with in very different ways; Android users, for instance, will look for a “hamburger” style navigation menu, while iOS users will look for a bottom navigation bar.

Android design principles

Create. Unify. Customize. These are the ideals of Android, and specifically, Material design. Material design focuses on typography, grids, space, scale, color, and imagery, and a meaningful, focused hierarchy that immerses users in the UX of the app.

Click here for the full list of Android core design principles.

iOS design principles

Clarity. Deference. Depth. These are the themes that separate iOS from other platforms. Some other words that pop up a lot in Apple’s iOS design guide are understand, familiar, subtle, and functionality. iOS guidelines dictate apps with an esthetic that fits the brand of the app, consistency of theme with iOS as a whole, and fluid manipulation and feedback.

Click here for the iOS style guide.

General app design principles

Whether it’s print, web, or mobile, good design is more than making something look pretty – design is understanding both the project and the problem – and knowing how to present that information in a pleasing way.

An important thing to keep in mind when designing your app is that any interaction should provide a user with some sort of feedback. Think of the difference between a website that features scrolling parallax versus one that doesn’t. Which one feels like the better, more responsive UX?

Smartphones are much more intimate than a desktop – they spend most of their time right next to us – and because of this, we expect our inputs when using them to have a sort of visual conversation with us.

You want your app to feel like it belongs on the users device, and for iOS and Android users, this will mean different things. While Android apps tend to be more customized than iOS apps, both feature libraries of visual elements available to all UI/UX designers. Don’t be afraid to use these – in fact, Apple encourages it. Your app should feel as native to the user as their native texting app.

This is why we believe native development is always the best choice in the long run – even if that means increasing the time and money spent in the development stage. While building multiple apps for different platforms can be more expensive in the beginning, having two native apps that perform better with users than a single hybrid app is a more sustainable and scalable business model. For more reasons why we believe native is the better choice, visit our blog on the topic.

Another thing to consider is not only the hierarchal flow of your app, but the visual flow as well. For example, when an iOS user sees a screen come in from the bottom of their device (known as a presentation), they intuitively expect a step that must be completed before moving back to the previous screen. If a screen comes in from the side (known as a push), they intuitively know they’ve moved on to the next step.

It’s choices like this that may be small on their own, but the summation of their parts as a whole create a consistent visual language and flow throughout your app – which is one of the main hallmarks of good design.

Nitpick the details

Details matter – an app should never have to come with a set of instructions in order for a user to know how to properly interact with it. It’s the small details that will provide your users with the hints and visual cues they need to navigate your app.

Subtly is key to mobile app design. Something as simple as a highlighted or muted color can imply a button’s functionality – if a button is a bright color, your users will expect it to accomplish something. If a button is a muted color, like grey, they will intuitively expect it to perform an action analog to a canceling function.

There’s a balance to these fine details, however. Keep your design as simple as possible – if the people you present your prototype to can’t figure out how to navigate your app in a few minutes (or ideally, 30 seconds), it’s time to go back to the drawing board and figure out how you can simplify things.

Understand the problem

That’s the most important part of mobile app design. It doesn’t matter if you’re not a designer yourself – knowing what your app needs to accomplish will dictate everything about it. It’s a quote I’ve used before, but I feel Frank Lloyd Wright’s words fit perfectly in reference to mobile design:

Form follows function – that has been misunderstood. Form and function should be one, joined in a spiritual union.

How to communicate with developers

We are recognized as a top App Design & Development Company on DesignRush.

The wind blew across the blue waves, and set the tone of the day: blue. There is a downed tree in their yard, I wonder when they’re going to take care of it? Buffalo buffalo Buffalo buffalo buffalo buffalo Buffalo buffalo.

Language is an imprecise tool – especially when you’re attempting to communicate abstract, involved ideas and concepts. Language barriers aren’t just limited to foreign languages – they’re present amongst different professions as well.

Take, for example, the muddy waters of acronyms (which tech is rife with): A chemical engineer is talking to a software engineer about APIs. The chemical engineer thinks they’re speaking about Active Pharmaceutical Ingredients, and the software engineer is thinking Application Programming Interfaces – they’re both engineers (admittedly in very different fields) but they’re talking about completely different subjects, all while using the exact same acronym.

This game of telephone is compounded when two (or more) people who work within completely different schools of thought are communicating the intentions of their ideas. We’ve all been trained to think in different ways, depending on our type of profession: writers live and die by the five w’s and the upside down pyramid, while graphic designers think in the rule of thirds and adhere to visual hierarchy. Mechanical engineers live and breathe f=ma and deal with safety regulations while physicists work with… well, who really knows? You get the idea.

Okay, okay… just one more. A software engineer is sent to the grocery store with a set of instructions: “Buy a carton of milk, and if they have eggs, get six.” The engineer comes back with six cartons of milk. The person who sent them to the store asks, “why did you buy six cartons of milk?” The engineer replies, “They had eggs.”

How to break through the barrier

The first thing to keep in mind (and this is very important) is that software engineers are people too. As much fun as it is to pretend like they’re robots, they have feelings just like you and me – and communicating with them as such is crucial to a successful development cycle.

The easiest way to get around miscommunication is to accept it will happen – and plan for it in your development schedule. There’s a lot going on during mobile app development – a UI designer will look at a project one way, while a programmer will look at it from a different lens, and a project manager will have a unique perspective as well.

Treat your people like people, and you’ll already be miles ahead.

Be organized

It doesn’t matter what tools your team uses to communicate with each other and keep tasks organized – all that matters is you do it. There’s a bunch of project management platforms out there for you to choose from, but it’s important to pick the one that fits your team’s needs and preferences the best.

We like to use Trello, as we can keep track of an entire sprint and the tasks that make up the sprint in an easily digestible format. Our project manager will break these tasks down into individual features that need to be implemented, with specific details of what the final product should be – the flow, the visuals, and the information that must be included.

It’s important to make a distinction here – a project manager doesn’t tell the software engineers how to implement a feature – just what features need to be implemented where. A good project manager can admit they aren’t as technically savvy as the software engineers (unless they were originally a programmer), and will communicate that to their dev team. A good project manager should also know every use case scenario, every step of the app’s process and it’s flow, and it’s entire feature set.

Our project manager rarely fields technical questions – most of the questions software engineers will ask are more about clarification than “how do I do this?” Questions you can expect from developers will be:

“Where should I place the quotations in the text field?” Or, “What font should I use?”

It’s best to provide every piece of information every time. Don’t worry about making your lists pretty – software engineers aren’t worried about that. What they’re concerned with is getting things to their exact specifications. If your project uses multiple fonts, denote which fonts should be used where for each and every task. If you need an to turn 50% opaque after being interacted with, include that information in the task.

There’s no such thing as “over describing” when it comes to code. Say what you mean in the simplest terms possible, repeat information whenever necessary, and communicate exactly what you want and expect. The less wiggle room, the better – be direct.

Code iterations can become repetitive – if you have a sneaking suspicion that you and a software developer are speaking about two different features, clarify. Programmers love clarification.

A picture is worth a thousand words

A prototype is worth a million. If your software engineers can actually analyze what the final product should look like, and how it should act, they’re much more likely to implement your concept correctly. Just like project management tools, there’s a lot of prototyping platforms out there. We prefer to use Invision.

It’s good practice to keep track of your assets by assigning a universal naming convention, i.e. “homescreen_header.svg” rather than just “header.svg”. This will help your developers keep track of what goes where. Checklists are a big help here.

Don’t be afraid to use sketches either – they don’t have to be pretty to get the idea across. Use every medium available to you to express your idea before development gets into the swing of things. Use flowcharts to help software engineers keep track of the flow of the app.

Know your project

Top to bottom, front to back. The more you know about your project – the better. Software engineers don’t have the answer to everything. The work they do might seem like magic, but a lot of programmers are very specialized – a front end developer might even have less knowledge about backend logic than you!

The key to good development is to build a good relationship with your software engineers – and this is achieved by clear and concise communication.

Measuring your app’s success – with Kumulos

For the past couple of months we’ve been going over both the basic theory of, and different strategies for the implementation of a successful ASO campaign. But one (very important) part we haven’t covered is how to actually measure your app’s growth.

There are many different ways to go about measuring your app’s success, but we’re going do a virtual tour of our favorite app analytics platform – Kumulos.

Before we do, we’re (really quickly) going to go over the absolute basics of ASO, and why it’s just as important to keep track of your ASO campaign as it is to come up with one.

ASO: Just the facts

  • ASO stands for App Store Optimization, and is the process of improving the visibility of an app through the means provided in the App Store or Google Play
  • Keywords are the basis of ASO – just like SEO
  • ASO isn’t just limited to the App Store or Google Play – it ties in with your SEO, as well as the UX of your app itself
  • The rules and trends of ASO are ever changing – just like SEO

Why you need to keep track of your app’s performance

Just because a keyword works well one week doesn’t mean it will perform well the next – staying on top of keyword trends requires close observation of your install rates when changes occur. Also, a powerful tool, A/B testing, can provide a big boost to your app’s rankings – but only if you analyze the data your changes bring.

Keeping track of your competitors performance is just as important as analyzing your own app’s success, and we’ll cover how to do just that a little bit later in this blog. To put it simply, if you’re not analyzing your app’s (and your competitors’) performance, you’re flying blind – and your ASO efforts will eventually hit a wall.

Measuring your app’s success – with Kumulos

There’s a lot you can do through Kumulos:

    Keep track of your ASO campaigns on both the App Store and Google Play – from your app’s description to when you last updated it, and everything in between

  1. Analyze (and create) reports on user acquisition and retention, as well as audience engagement, conversion rates, and your API performance
  2. Explore and analyze events
  3. Keep track of your backend: API use, current SDKs, tables, and more
  4. View reports that are updated every 5 minutes covering app issues, crashes, and other monitoring checks
  5. Last but not least- schedule, implement, and analyze push notifications
  6. Managing your ASO with Kumulos

    Kumulos

    This is the screen you will see after opening your app’s ASO tab. From here you can view all of the information your app displays on the App Store and Google play.

    From the ASO tab, you can compare both your App Store and Google Play efforts. This keeps the access of this information in one place, making it easy for developers to keep track of both campaigns – and allows for simple synchronization, or differentiation, depending on how users on both platforms respond to your ASO campaign implementations.

    Kumulos

    When you click on a specific tab under ASO, Kumulos will give you a detailed breakdown of all pertinent data

    Not only does Kumulos keep track of your keyword rankings, it also helps you figure out how your competitors are doing as well:

    Kumulos

    By clicking the gear highlighted above, you can find a lot of information on your own keywords, and your competition’s:

    Kumulos

    Knowing what keywords your competition is ranking for can help you decide where to focus – consider the following when strategizing your keywords:

    • Just because everyone else is competing for a certain keyword or phrase, doesn’t mean it’s the best
    • Try putting high-competition keywords in the title of your app. For example, “Brew Trader – Trade Beer Better”
    • Mix in low-competition keywords to catch potential users, such as “Beer Trader” versus the more popular “Beer Swap”
    • Make sure most of your keywords and phrases are as specific as possible – while it is important to rank for generic keywords like “beer,” you’ll achieve higher rankings by getting specific with your keywords

    Kumulos also keeps track of your app’s user ranking and user reviews, so you never have to leave the Kumulos portal to analyze the entirety of your ASO.

    Tracking analytics with Kumulos

    Kumulos

    This is where things start to get really cool – as you can see above, there’s a lot you can do with the analytics tab.

    1. Acquisition

    Kumulos

    By clicking the menu button highlighted above, you can select specific items to visualize

    Some things to keep in mind when looking at your app’s acquisition:

    • Retention is an important stat if you app has a demand for daily use – if it doesn’t, you don’t need to worry about it too much
    • Daily users and monthly installs are key metrics to keep track of
    • Look for power users (users who log in continually and daily)
    • Your acquisition report is your key to A/B testing – this is where you’ll find out if the change you made (such as switching your app’s icon or swapping a keyword) had a positive or negative impact on your conversion rates.

      Under acquisition, you’ll also find:

      Kumulos

      How your rankings have changed over time, compared to your competitors.

      2. Audience

      Kumulos

      You’ll use this tab to figure out where you users are coming from, as well as:

      Kumulos

      Breakdowns of which users are using which platform (sorted by version), and which version of your app they are using.

      Use this section to help plan your acquisition campaigns, and keep track of the OS users are on – if a large portion of your users are on older versions of an OS, you’ll want to make sure your updates don’t ruin their UX (such as reducing the compatibility with smaller screen resolutions).

      3. Engagement

      The first thing you’ll see under engagement is this:

      Kumulos

      By studying your session distribution chart, you can figure out the best times to send out push notifications. There are two ways to go about scheduling push notifications:

      1. Send notifications on a busy day right before a peak usage time (in order to maximize the number of users in a given span of time)
      2. Or, send notifications on slower days to boost retention on low volume days

      You can always mix and match to get the most from your push notifications, but we’ll get more into that later.

      Reports via Kumulos

      My favorite Kumulos feature is the report tab. You can generate an interactive PDF based on a range of dates that will provide a breakdown of all the information you’ll need to make strategic decisions for your ASO campaign.

      Kumulos

      Push

      Kumulos

      Under the push tab, you can keep track of who is subscribing to your push notifications. You can also schedule and automate notifications, as well as target specific groups of users, and analyze who’s opening what.

      Kumulos

      Kumulos does a fantastic job of organizing a facet of ASO that is difficult to keep track of, especially with the “sent” tab. Here, you can look back through your app’s history of campaign-driven and event-driven notifications in order to keep track of where you are within a campaign.

      Backend

      Kumulos

      Here you can find everything you need to keep track of your app’s backend: API use, SDKs, API performance, Hookup connection, and all of your application’s details.

      Diagnostics

      Kumulos

      This is a tab you should visit at least once a day – the effects of crashes or app issues on your app’s ASO can quickly spiral out of control. Kumulos helps you keep track by continuously updating this tab every five minutes, so you know as soon as something happens.

      Kumulos is an all-in-one app analytics platform

      Not only does Kumulos provide a complete hub of all your ASO information, it’s very user friendly – this is especially due to the report feature, which allows you to send all the analytics of a campaign in an auto-populated PDF for easy dissemination of information. We love sending these reports to clients, as the data breakdowns are simple enough for anyone to digest – whether or not they know the theory behind ASO.

      The push feature is great as well – not only does Kumulos keep track of all your analytics, it actually provides an actionable service. This is a powerful inclusion in the platform, as it gives you the ability to directly analyze user opening trends, and create a new push campaign based on your analytics, all without ever leaving their service!

      Anyway, I just want to say a thank you to the folks over at Kumulos for their help with this blog – and if you’re interested in getting started with Kumulos, drop by and give them a ring! They’re all fantastic people!

All about beta testing: When, why, and how

There’s no harsher reality than facing criticism about something you call your own, especially after investing time and resources into your brainchild. This is, however, a crucial step to the success of any business venture, and doubly so when it comes to the app development cycle – and by facing the music before launch, you can jumpstart your app on its path to success.

Marketing companies use focus groups, manufacturers meet standards with quality assurance, and software developers rely on beta testing.

What is beta testing?

There comes a time in every app’s cycle of development where it’s mostly put together, and it’s ready to test its wings. Before its inaugural flight, however, it’s a smart move to have a dress rehearsal in order to identify bugs. This is the purpose of a beta test; it’s a limited release of your app (as its most current, nearly-complete version) among a select audience, with the expectation of receiving constructive criticism about your app from that audience.

It’s an integral but over-looked facet of software development, and while this does add another step to the app development cycle, it ultimately reduces cost, cuts time spent debugging, and serves as a testing ground for future user acquisition and retention strategies.

Below, you’ll find a bunch of reasons detailing why beta testing is important, what you need to know in order to successfully run a beta test, and who to include in your app’s beta test.

Improve your app’s quality

Most developers have their own app testers, and software engineers and project managers will also test builds after every sprint, but there is one major issue when it comes to a dev team testing their own app: they know the ins and outs of the build, the exact specifications of the app’s intended use, and every aspect of the app’s flow. While it’s important to have the team test their own work, it’s virtually essential to bring in outside perspectives in order to catch every snag and bug.

Different testing environments: When you open your app to beta testing, you gain access to a wide variety of devices and usage environments through which to test your app. This is important because your app might not work or display the same way on a Galaxy when compared to a Pixel, just like how a website can look different depending on what browser you’re viewing it in. The actual environment a user is in can also affect the functionality of an app – especially if it requires a wi-fi connection. Your app must work the same everywhere, regardless if the user is in a sub way or a corn field.

Bug detection: The more people that are involved in testing, the greater a chance of a bug being caught. This is because the user base involved in the beta test won’t follow intended user paths as readily as your own dev team, due to lacking the familiarity your team has with the app from actually building it. Its like the difference between an artist explaining their work, versus someone else describing how it makes them feel – while the artist might have a more intimate connection to their piece, what really matters is how their audience feels about it.

There’s something to be said about making something yourself, whether it be a meal or piece of art. There’s nothing like coming up with an idea and executing it from inception to completion, all on your own.

A lot of developers will pay to have a dedicated tester for this very reason, and launching a beta test of your app is essentially adding hundreds (sometimes even thousands) of testers for free.

Improve user friendliness: Not everyone thinks the same way – and that’s a good thing when it comes to beta testing. By bringing in extra pairs of eyes into the testing of your app, you get a clearer picture about how your users will actually interact with your app. Steps in your apps flow might have seemed clear to your development team, but might not be to your beta test users, and it’s always better to rework your app’s flow before its true launch. Users are naturally more forgiving during beta tests than they are with finished products, so they are more likely to give feedback when confused, rather than just abandoning your app for another.

App performance (tech stack): During your beta test, you can analyze different aspects of your app’s performance, the first being the technical side of your app. By looking through multiple user scenarios, you can see what functionalities are used, and which are ignored. If possible, either take these ignored features out of your app entirely, or reduce them to the aspects that are actually being used. Reducing the overall size of your app is important, as 25% of smartphone users have deleted an app from their device solely to free up storage space.

You can also test for crashes and other app-breaking bugs, another big detractor from your app’s user retention.

App performance (user behavior): The second aspect of app performance you can analyze is your app’s user behavior. Despite mapping out the obvious aspects, like user flow within your app, you can analyze other trends, such as the daily, weekly, and monthly patterns of user retention. By figuring out the rate of engagement within your app, you can set a schedule of push notifications, and try it out, all during the beta testing. This will take away some of the burden of creating your ASO campaign.

Reduce cost

It might seem a little backwards, but adding in the extra step and taking the extra hours to conduct beta testing actually reduces the overall cost of making an app. This is for two main reasons:

  1. Speeds up the publishing and app launch process
  2. Reduces overall testing time

Both the App Store and Google Play have rules for publishing your app, and the App Store has an actual app review process. If your app doesn’t meet certain guidelines, it will be denied, and you’ll have to go through the process all over again, which delays your app’s launch, therefore increasing the chances of a competing app getting to market before yours does.

Beta testing also reduces your time spent testing your app – this is because you iron out all the kinks in one fell swoop – rather than testing being staggered and dispersed over the course of weeks, or sometimes even months. When you have your entire team (as well as a dedicated user base) focused on the testing of your app, you can dedicate more resources and developers to identifying and fixing issues before launch – rather than launching first, and then attempting to fix issues that are hurting your app’s reputation, all while working on the development of another app.

Increase your potential for growth

Beta testing can increase your app’s growth potential in two ways:

  1. Word of mouth advertising
  2. Boosting your app’s ASO by building a dedicated user base before its actual launch

When users are included in a beta test, it makes them feel special – it is exclusive, early access to the app, after all. Early adopters tend to be more engaged with apps than regular users, and are more likely to view your app favorably, as they will witness the app grow to accommodate their criticisms. If you listen carefully, and implement changes based off of your beta testers’ feedback, they’ll form a strong bond with your app, and are much more likely to advocate your app to their friends than if they found it naturally. Beta testers will sometimes tell their friends about a new app they get to use before everyone else, instilling feelings of envy among potential users. When your app is actually published, those users will immediately jump on board.

A huge portion of your app’s ranking on the App Store and Google Play is determined by user ratings and reviews. While users can’t review or rate your app during its beta testing phase, they’ll be ready to review and rate it on day one of its actual release. Rather than slowly building up ratings and reviews after launch, you’ll have multiple from the beginning, giving you an extra boost, and helping to differentiate your app from competitors. New users are much more likely to download an app if it already has ratings and reviews, giving you another leg up on increasing your user acquisition – which increases your app’s rank, and provides the foundation for an upward trend of growth.

You can also pay attention to the language beta testers use, and implement popular phrases or words as keywords for your ASO campaign.

Who you need

It’s important to include the right people in your beta test – you’ll want a mix of users who are well-versed with your app and those who are new to it, as well as technically proficient users, and not-so-technically savvy users. The most important audience to include, however, is the community you intend to engage the most with.

From your own development team, you’ll want to include:

  • Product managers
  • Sales staff
  • UX/UI designers (preferably those who haven’t worked on you app)
  • Quality managers
  • The developer’s dedicated app tester(s)

Externally, you’ll want to find:

  • Early adopters
  • The community your app is intended to engage with

Social media is a fantastic way to find (and engage) your app’s intended audience. Reddit is, perhaps, the best place to find your tribe, however. Say, for example, you want to run a beta test for AnswersNow, an app that connects autism experts with caretakers, and helps the caretakers provide better care by answering their questions in real-time.

By going to Reddit and searching “autism,” you can find r/autism, a ten-year-old community with a user base of over 40,000 subscribers. When you directly engage with a community like this, you’ll usually find more people signing up for your beta test than you have spots to fill, and the community will be especially forthcoming if you’re giving them early access to an app that provides a solution to a pain point in their daily lives like AnswersNow does.

When to beta test

There’s definitely a right and wrong time to beta test. Too early, and your testers will abandon your app due to lack of functionality. Too late, and there’s hardly any benefit to the actual testing – the more complete an app is, the more difficult it is to implement changes to its code, UI, and UX.

You’ll want to implement your beta testing when your app has enough functionality to test 90% of scenarios from start to completion. For example, if you’re running the beta test for AnswersNow, you’ll definitely want to make sure the chat functionality of your app works, as that’s the backbone of the app. Quality of life features and elements like graphic icons don’t necessarily have to be there yet – but your app should at least have a logo. Think about a dress rehearsal versus an actual play; during the dress rehearsal, costumes aren’t used, and every actor knows their lines, but they can always ask for help if they forget. During the actual play, everyone is dressed up and 100% ready to go.

How to build a mobile app: Build cycles

Every business has a process, just like every recipe has a set order of steps – and, just like a recipe, if a business’ process is out of order or incomplete, the final product can end up tasting pretty bad.

Developing a mobile app is no different – missing (or incorrectly implementing) a single step of development can throw a wrench in the process, causing days or sometimes even weeks of delays and re-structuring code.

Every developer has their own tweaks and differences in their development process, but the overarching steps are generally universal in their order. You wouldn’t bake a cake and then put in the flour, after all.

The mobile development cycle

  1. Research
  2. Design
  3. Prototype
  4. Determine feasibility
  5. Program
  6. Test
  7. Publish
  8. ASO & app marketing

These steps, while ultimately implemented in this order, do share some give and take, especially between steps 5 and 6; a dev team will program and then test – and after finding bugs, may return to any point of the process depending on the problem that was discovered.

This method of coding, testing, and then coding again is what’s called agile development. Dev teams that work within an agile development cycle work in sprints – coders will build a feature or feature set usually over a period of one to two weeks (we like to work in one week sprints to really take advantage of agile’s full potential), test the build, debug, and then implement their current branch into the master branch of code.

But, before we get more into steps five and six, let’s talk about step one…

Research

This is possibly the most important step of any business venture – without properly researching your target market, audience, and the competition you will face, there’s no foundation to build a solid structure upon. The story about the three little piggies? Yeah, it’s like that – but it’s your money being blown away, not straw. As we’ve gone over before, there are a few questions to ask that can help guide your research:

  • What do I want my app to accomplish?
  • What platform(s) do I want my app to be on?
  • What is my competition?
  • What is my time table?
  • What is my budget?

Some of these questions will lead the direction of your research, and others will be answered by your research. For instance, your findings about your target audience will dictate what platform(s) you will publish your app on, while knowing what you want your app to accomplish will determine the target audience you will want to tap into. If you want to build a productivity app, for example, your target audience will mostly be persons over the age of 25, while a mobile game might go after a target audience in their teens.

Other times, finding an untapped market might dictate what you want your app to accomplish – there’s a lot of research methodologies out there – but no matter what, every step you take should be to figure out the best way to solve your intended audience’s pain point.

What’s a pain point? Let’s pretend our target audience is… squirrels. Yeah, squirrels. You’ve seen a lot of the furry critters complaining on social media about always losing the acorns they’ve buried, and you’ve decided your going to build an app that helps them keep track of their acorn haul.

The pain point is squirrels are constantly losing acorns – your app, and everything it does, is intended to solve it.

Design

Sketch

Good design is the blending of both form and function to create a simultaneously visually pleasing and useful tool that provides the functions necessary to solving your users’ pain point.

In other words, don’t just make something that’s pretty – make it work for your users. A good way to go about getting into your users’ heads is to come up with user stories; a helpful tool for figuring out what design choices you should make, and how the functions of your app will flow together.

For example, our squirrel-based acorn finder app (which from now on will be referred to as Nutsapp) should have a pretty simple design, as it really only needs to accomplish a few functions to solve the squirrels’ pain point:

  1. Provide users with a map of the surrounding area using GPS
  2. Allow users to place geotags where they’ve buried acorns using location services
  3. Store the geotags in searchable lists – e.g. “acorns by proximity” or “acorns by date buried”

So, we have our user story; a squirrel buries an acorn, opens Nutsapp, places a geotag on their map, and eventually, searches a list to find it again. Based on that, we can create wireframes to determine how the information will be displayed on the squirrel’s mobile device, and based on those wireframes, we can build the UI of the app itself in a program like Sketch.

Then it’s on to the next step…

Prototyping

During this next phase of development, the designer of Nutsapp would build the prototype in a program like Invision. This is where UX is the main focus – prototyping is used to determine whether or not a design makes sense when actually used to solve the pain point of an app.

The development team should always keep in mind use case scenarios during this step – if the app’s flow doesn’t make sense, it’s time to go back to the design phase.

There’s a lot of back and forth between prototyping and design – and that’s a good thing. This is the first step that designers and programmers work with each other, and together, they can determine the next step of the development phase.

Feasibility

Once the programmers for Nutsapp have looked at the prototype, they can then determine the feasibility of its functionality. The programmers will look into whether the necessary back end integration is achievable or not, and determine what APIs will be used to provide users with the functions Nutsapp needs to work.

If a part of Nutsapp’s design isn’t feasible, the programmers will usually work with the designer to figure out a good way to achieve the necessary UX and functionality while still working within the realm of what’s possible to code.

Programming

Coding

Speaking of code, this is where the magic happens. Programmers will take the designed UI/UX and build based on the prototype provided (which is why it’s so important to nail down look, feel, and feasibility of the prototype before moving to this step).

Usually, devs will:

  1. Build the UI
  2. Connect the UI to the code that makes it actually function
  3. Define the data model (the structure of information in the app)

If the dev team is working within the agile method, after each sprint, the team would meet up, discuss their progress, test the functionality, and determine the goal of the next sprint based on the findings of the testing. This cycle is repeated until the app is completely built.

Testing

While Nutsapp’s dev team has been testing after each sprint, after the app has been fully coded, it’s time to move on to beta testing. This is an important step, because it gives you the chance to see how someone who has no knowledge of the inner workings of Nutsapp interacts with and navigates the functions within the app.

It might feel a little disheartening, but do your best to try to break your app. Push every button you can faster than a squirrel normally would, attempt to complete steps out of order, and see what happens when information is input incorrectly.

When you find bugs – and most likely, you will – go back to the programming phase, and fix them. It’s always better to find and fix bugs before launch, even if this delays the launch of your app. Squirrels, just like users, are skittish, and any hiccup in the UX of an app can cause your target audience to abandon your service.

Publishing

After (throughly) testing and de-bugging your app, it’s time to move on to publishing. Both the App Store and Google Play have different publishing rules, and if you’re searching for a quick rundown, look no further than our How much does it cost to make an app? blog.

ASO & app marketing

We’ve gone over ASO and app marketing before (multiple times, in fact), so if you want to go over both the basics and the nitty gritty, visit all three of those blogs.

Your ASO and app marketing campaign are mostly based off of your findings from the first step of the development process – research, and as such, your ASO and marketing campaign should be developed over the course of the entire process. The reason we’ve listed this step last is because ASO and app marketing never end.

Your competition is constantly changing, along with the needs of your users and the trends they expect to be followed. A few ASO rules to always follow are:

  • Update your app frequently, but not unnecessarily
  • Use A/B testing on your app’s page on the App Store (or Google Play) to determine what works best to capture your audience’s attention
  • Keywords, keywords, keywords – look at what keywords your competitors are using, see what you can do to beat them, and figure out keywords they aren’t using to their full advantage to capture an untapped segment of potential users

Your ASO and app marketing efforts should work in tandem – people generally use the search feature of both the App Store and search engines like Google in the same way. If a squirrel is searching for “acorn finder” in Google, they’re most likely going to search for the same thing on the App Store.

Some sections of your app’s page on the App Store don’t rank for keywords, so consider putting your most important and strategic keywords in your app’s title, after the actual name of your app. In the case of Nutsapp, this would look like: “Nutsapp – Acorn Finder.”

Agile development fits its namesake

It’s called agile, because that’s what app development needs to be – adaptive to the issues every development cycle will face, and quick to respond and fix those problems.

How to Build a Mobile App: ASO 101

By now, you’ve probably heard the term “ASO” come up in workplace conversations, whether at a company meeting or from your office’s resident tech expert. We’ve written a few pieces about the topic already – but if you’re a CTO or appreneur that wants to brush up on the basics of ASO without digging through boring dev and publisher guides, you’ve come to the right place!

What is ASO?

It’s an idea that’s been around since the early 2010’s, but don’t be embarrassed if you don’t know too much about it – six years ago App Store Optimization was in its fledgling stage, and it wasn’t until recently that ASO became a necessity like other facets of digital marketing (social media, and SEO for example).

It’s an ever-evolving field, as Apple and Android have spent the past decade revamping and refurbishing their respective app stores – much I the same way Google has updated the parameters and functionality of SEO.

ASO, at it’s heart, is powered by keywords, just like SEO – except with a limited amount of available characters. Think of the difference between ASO and SEO like the difference between Twitter and Facebook; just as tweets must be short, quippy, and straight-forward, so too must be your ASO efforts.

The two fronts of an ASO campaign

User acquisition, and user retention, in that order. These can be broken down into sub-categories:

User acquisition:

  1. Keywords
  2. The app’s build and compatibility
  3. The app’s actual page on the App Store (you can think of this as your app’s storefront)

User retention:

  1. User reviews and ratings
  2. Time users actually engage with the app
  3. In-app purchases (if applicable)

Keywords

Keywords are the bread-and-butter of any ASO campaign. The App Store’s search option functions in largely the same manner as a search engine like Google: users input a phrase or word, and the App Store displays apps based upon relevance and ranking.

Keywords are the foundation from which to build your ASO efforts, and effectively implementing them is crucial to your app’s success on the App Store. The most important steps you can take to ensure your keywords are working for you is to:

  • Know your competition and
  • Start with 2-3 keywords (as your campaign matures, consider utilizing up to five main keywords)

Tip: Use keywords consistently throughout your app’s title, subtitle, and description. This will help you gain ground as you launch. Don’t be afraid to borrow ideas from your competitors too; if it works, it works. Research is key to your success – consider the consequences of either using the keywords your competition is using, or finding another set of keywords to focus on. Which is more likely to get you traffic? If you believe you can compete, do that. If you’re not so sure, try to catch another segment of your target audience, and slowly build up to where your app can compete with the top performers.

For more info on keyword research, check out our piece on the topic.

The app’s build and compatibility

These are considerations that you should take into account before publishing your app to the App Store – in fact, even before development begins. This is a balancing act, as increasing the number of platforms an app will run on also increases its development cost, but simultaneously increases its potential audience.

Some questions you should ask yourself are:

  • Is my app compatible with the latest devices?
  • What platforms does my app belong on? (iPhone, iPad, AppleWatch, etc.)

Tip: Another big (and often overlooked) factor is your app’s footprint on a device’s storage space. According to this study by The Manifest, 25% of mobile users have deleted an app purely based on the need for extra storage space. The smaller your app is, the less likely this is to happen.

The App Store

Whystle App Store Profile

Above: An example of what an app looks like on the App Store.

This is where all of your ASO efforts come to a head. Your app’s page on the App Store is powered by metadata:

  • Title (limited to 30 characters)
  • Subtitle (limited to 30 characters)
  • Promotional text (limited to 170 characters)
  • Description
  • Up to 3 preview videos
  • Up to 20 promoted in-app purchases

Your app’s icon and preview images also effect how people interact with your app on the App Store – think of these as your app’s visual branding elements.

You app’s title, subtitle, and in-app purchases rank for keywords, while your promotional text, description, and visual elements don’t rank in searches. Every section is important to your user acquisition, however – make sure you give each section its due. This is your app’s brand, storefront, and demo space all wrapped into one – any missing or underutilized section will immediately turn off users from downloading your app.

Tip: A powerful method for improving user acquisition is A/B testing. Don’t be afraid to play around with elements like your app’s icon or description – just make sure you analyze data before and after changes so you can study their impact on conversion rates. If you notice a dip in your numbers, you can always change them back. Subtitles, for instance, are a great place to capitalize on trending phrases. For more info about keeping up with trends, check out our piece written for The Manifest.

User reviews and ratings

Whystle Ratings and Reviews

Above: An example of user ratings and reviews.

Your app’s user reviews and ratings are the middle ground between user acquisition and retention, as they affect (or are effected by) both. If your app has good ratings and reviews, it’ll most likely have high download numbers (or at least higher than if its ratings and reviews were mediocre), and good ratings and reviews usually stem from proper user retention practices.

Apple (and the App Store, by proxy) take your app’s rating and reviews seriously, and they have a direct effect on your app’s ranking – the better reviews and ratings you have, the better of a spot your app will receive when users search for keywords your app is ranking for

Tip: Take heed of users’ reviews, and act upon them. Use updates to your advantage – you’d be surprised at the impact listening to (and implementing) a user’s suggestions can have on your app’s retention.

Time spent engaging with your app

Just as keywords are the driving force behind your app’s user acquisition, the time users spend engaging with your app is the primary factor the App Store uses to determine your user retention. There is no set of guidelines to achieve high user retention, but some determining factors are:

  • Your app’s UI/UX (for novel ideas on how to improve user acquisition through UI/UX, check out our post on the topic.)
  • The way your app was developed (Hybrid vs. Native development)
  • The implementation of retention strategies (Push-notifications and regular updates

There are a lot of different services to help keep track of how users interact with your app (we tend to use Kumulos.) These help with determining what features your users spend the most time interacting with, how they use your app, and can also be used to track crashes, or where in your app users stop their sessions (usually due to slow load times or visual errors.)

Tip: Never underestimate the power of an update. Updates, unlike most push-notifications or requests to rate an app, promote a sense of curiosity in your users; they will be drawn to open your app to see what’s new.

The long and short of it

ASO is the culmination of directly-managed deliverables. Through proper keyword research, utilization, and implementation, good UI/UX, and strategies to engage users within your app, you can turn your ASO campaign into the driving force behind your business. Don’t be afraid to play around with your app’s page on the app store, as trending topics can lead to a surge in your conversion rates, and changes that decrease your app’s performance can always be switched back.

Good luck, and happy ASOing!

iOS Development and Swift Code – What you need to know

Everyone knows the two major players on the mobile platform market – Apple and Android – but what makes these platforms tick?

If you’re an iPhone user, your phone runs on iOS, which utilizes the programming language Swift. Swift was released in October of 2014, and is currently in its fourth iteration, aptly named Swift4. As our third installment of How to Build a Mobile App: the Ultimate Guide, we’ll go over what you need to know in order to make informed decisions about iOS development, and key terminology that will help you better communicate with (and understand) Swift developers.

Disclaimer: If you’re a developer or software engineer, there might not be any new information for you to find here. For a more in-depth discussion about app development, check out our addition to the native vs. hybrid debate.

If you’re a CFO, business developer, or appreneur who’s trying to figure out what a software engineer is talking about when they say “back-end integration,” or want to know just what exactly is an API, you’ve come to the right place.

As of June 2018, iOS accounts for 44.5% of the worldwide mobile market – a growth of 15% since January of 2012. In the US, iOS boasted a market share of 63% in 2018. With over 2.1 million apps on the App Store, Swift can be used to create programs on all of Apple’s platforms – iOS, macOS, watchOS, and tvOS.

Swift is based on and emulates the functionality of the C family of programming languages, including Objective C and C++, with an open source community of developers at swift.org. Swift’s open source code is hosted on Github, an online community of over 28 million developers for hosting and reviewing code.

Due to the open source nature of Swift, the Swift community has compiled libraries to share with other developers. These libraries are resources of generic, useful code that can run on all platforms supported by Swift, and include character sets, support for dates and times, interaction with the file system, and many more functionalities. Swift comes with a default library, but these extended libraries, named the Swift Core Libraries, are continuously updated by the open source Swift community – allowing developers to utilize the newest innovations in Swift code (without writing it themselves). This code can then be customized to fit any need.

Swift can also be used on a Linux distro to build both libraries and applications, and the open source community is currently working together to bring Swift to other computer platforms.

The tools available to developers

While coding, Swift developers use XCode to write, and can use playgrounds to view their code’s outcome in real time. While working collaboratively, developers will use organizational tools such as beanstalk, which are used to keep track of code and current projects. These organizational tools are especially important when collaborating on a project, as any difference in a line of code between two workspaces will result in a merge conflict. When this happens, both lines of code must be compared in order to identify the merge conflict, adding extra time to the debugging process.

Coding best practices dictate it’s always better for a software engineer to work in an isolated branch to avoid merge conflicts altogether.

Developers can use a git client such as Sourcetree to check code in and out of collaborative databases. Think of it like Google Drive – it’s a shared workspace for multiple developers to remotely access code from the same database.

The Swift process

Android Pie and iPhone 12.1.2

The overarching structure of a simplistic app designed in Swift is:

  • View Controller – Think of this as the frame of a painting. The view controller, which is aptly named, controls what you see on the screen of your mobile device.
  • View – Within the view controller is the view. Think of this as the canvas of a painting – the view makes up the sum of all visual aspects of the app. Each screen of an app is a different view.
  • Subview – Subviews are the individual sections that collectively make up the view. Think of a subview as specific sections of a painting, such as how the subject matter is distinguishable from the background. More specifically, a subview would be the keyboard section of iMessage, or the section where text messages display.
  • Buttons – Buttons are… well, buttons. Within subviews, buttons are the interactive elements of apps. Think of the individual letters of the keyboard section of iMessage.
  • Images – Also within subviews, images are used to display specific pieces of visual information, and range from photos to logos and icons. An image can function as a button.

In order to do this, developers:

  • Start with building the basic UI (user interface)
  • Connect the UI to their code
  • Work within the view controllers (different screens will have different views)
  • Define the data model (the structure of information in the app)

First, a software engineer will layout the screens of an app in a storyboard. This acts as the roadmap for what the completed app should look like, and individual elements on the screen are then connected to code. These elements are referred to as classes, and the code inside these classes controls everything that element does, and how it behaves. For example, a class could be set to darken whenever an element is interacted with by the user, or set to cycle through images at specific time intervals. Classes can be coded to act in almost any way the software engineer can imagine. As classes are built, the UI is connected to the code.

Next, the de-bugging process starts. This is where pull requests come into play. When individual software engineers write code, they work on a branch (a section of the apps’ code) separate from the master branch, in order to minimize the risk of depleting the robustness of the app’s original code. Before implementing the code they are working on into the master branch, a software engineer will make a pull request based on their individual branch versus the master branch. This pull request is in essence a review process – having a second pair of eyes look over code is a great way to catch bugs before they are implemented. The branch is tested, and after its final iteration, is implemented into the master branch.

Developers will repeat this process for every view controller until the app is completed.

The next step in development is beta testing, which we will cover in detail later down the road. After the app is thoroughly tested, the app is submitted to the App Store for review by Apple. During this step, you set your app’s availability (what regions it is available for purchase in) and pricing, and then after approval from Apple, the app goes to the marketplace.

Adding an app to the App Store costs $99 per year, and Apple keeps 30% of each sale. For more information about how much it costs to build an app, check out our blog post on this topic.

Down the line, we’ll go over Android development, so if you’re looking forward to that, don’t worry.

Glossary of developer jargon:

  • Adaptive interface: An app that adapts to the available screen resolution. Essentially the same idea as a responsive web page.
  • API: An Application Programming Interface is a set of functions, classes, and protocols that define how pieces of software interact with each other. They facilitate code creation by providing tools and building blocks that help companies connect their software with another set of software, or even other companies’ code.
  • API calls: Sometimes referred to as an API request, an API call is essentially a piece of software in an app connecting to a server, and requesting a data transfer.
  • Back end development: This forms the logic and data structure of the app.
  • Back end integration: This allows an enterprise system to connect to an app – for example, connecting the database of a website to an app, in order for users to access the database through the app rather than the website. The information is hosted on the website’s server, but is still accessible through the app itself.
  • Control: This is a type of view that responds to a user’s input, like our example of a button turning dark after interaction.
  • Enumeration: Referred to by developers as “enums,” an enumeration defines a common type for a group of related values, and allows you to work on these values in a safe way within the code.
  • Front end: This is the layer of the app that users interact with.
  • Adaptive interface: An app that adapts to the available screen resolution. Essentially the same idea as a responsive web page.
  • Function: A function is a reusable (and named) piece of code that can be referenced from many places in a program.
  • Iterate: To perform a certain task or function repeatedly.
  • Method: Like a function, a method is a reusable, named piece of code that’s associated with a particular class, structure, or enumeration.
  • On demand app: These are apps that allow users to find, connect with, and book a professional service.
  • SDK: A Software Development Kit is a pre-made software tool that can be used for a variety of functions. Some SDKs help with analytics, others provide debugging and maintenance utilities, and a whole host of other functions.
  • Structure: When written in Swift, structures are designated by the keyword “struct.” Structs allow developers to store data in the form of properties and functions.
  • Tokens: A token is a software based security tag that produces a single-use login password or PIN.
  • UI/UX: User Interface and User Experience are intrinsically tied to each other. UI is the layout and design of the front end of an app. UX is how the app flows, functions, and responds to the user’s inputs.

How to Build a Mobile App: The Ultimate Guide

It’s no secret that smartphones are quickly becoming intrinsic multi-tools that enhance our productivity, our access to information, and pretty much everything else in our daily lives. The meteoric rise of mobile devices is indeed a shake-up to an already volatile and new industry itself; it’s almost difficult to believe that mobile devices account for 63% of all internet traffic, a 6% rise from 2017.

Out of that 63% of mobile internet traffic, a whopping 90% was spent using apps. Just like the total increase of mobile traffic, app usage grew by 6% from 2017 to 2018 – a dip from the 11% between 2016 to 2017 – but still a significant amount of growth nonetheless, especially when accounting for certain app genres, like games, which are seeing users spending both more time and money on their interactions.

This is a trend that isn’t expected to stop any time soon, and if you’re an entrepreneur, or the CEO of a fortune 500 company, and you don’t have an app to enhance your business (or engage your customers), it’s time to get one.

Chapter 1: Native vs. Hybrid Development

Chapter 2: iOS Development and Swift Code

Chapter 3: How to find the perfect mobile app developer

Chapter 4: ASO 101

So, how do you go about making an app?

Building an app

Before we get into the intricacies of app creation, let’s go over what we’re going to cover in our How to Build a Mobile App: The Ultimate Guide.

  • The platforms available to you, and the code that makes them work
  • How to properly design your app
  • How to find and communicate with developers
  • Different types of development
  • App Store Optimization and how users engage with the App Store
  • Usage, keyword, and design trends
  • How to measure, grow, and ensure your app’s chance of success over its lifetime

For the next 22 weeks we’re going to dive deep into every facet of app development, from the very basics and first steps, to user retention and acquisition strategies. This is the How to Build a Mobile App: The Ultimate Guide after all, so strap yourself in for a five-month-long ride down the app creation highway.

For now, here’s an introduction to each topic:

The platforms available to you, and the code that makes them work

Mobile Platforms

When it comes to platforms, there are two main players; iOS and Android. Each has its own benefits and drawbacks when comparing the two – iOS provides greater stability and Android allows for more customization.

Apps that run on iOS are programmed using Swift, the most current iteration of the language being Swift 4. Swift can be used to code for iOS, macOS, watchOS, and tvOS. This is handy, as it gives you the ability to code for all Apple products while only requiring the knowledge of one language, but it limits your potential audience.

When programming for Android, there are many languages available to you: Java, C and C++, Go, and Kotlin – the most popular being Java. Android is open source, which gives you free reign to modify and distribute Android’s code at no charge. Android is used on a wide variety of mobile devices, which gives you the potential to open up a greater range of revenue streams, but this can also slow down your app’s development.

When it comes to choosing a platform for your app, there isn’t a right or wrong option – and frequently, the best answer is both. In the future, we’ll be looking more into the intricacies of developing for both iOS and Android.

How to properly design your app

App Design

App design is like butter on toast; not enough, and you’re in for a bland experience – too much, and you’re not sure whether you should eat it or throw it out to give your arteries a break. Due to user experience (UX) being so entwined with user retention and acquisition rates (as well as user ratings) an app’s design can make or break its chances of success.

Design trends are changing all the time, so it’s important to update your app to not only keep it secure, but to also ensure it stays relevant. User reviews are a great source to pay attention to when planning your app’s design – but always err on the side of caution when designing your app – if you can scrape some butter off of that toast without sacrificing flavor, get rid of the unneeded butter.

In the future, we’re going to cover app design principles from the ground up.

How to find and communicate with developers

Finding App Developers

There’s a multitude of developers out there, so how do you figure out which one is the best for you?

Rather than searching Google, it’s best to start with Clutch. Clutch is a website dedicated to providing a platform for entrepreneurs and businesses to search for developers that fit their specific needs, and is a great resource for vetting teams when deciding on a development partner.

As we cover development pitfalls and best practices, we’ll go into detail about how to ensure time spent building your app is never wasted, as well as tips on how to communicate effectively with your development team.

Different types of development

App Development

There’s plenty of fish in the sea, just as there’s a myriad of methods to structuring and planning your app’s development. The most common are Skyscraper, Agile, and Minimum Viable Product (MVP).

In short, the Skyscraper method relies on heavy planning and market research, Agile focuses on utilizing an adaptive, responsive method of development, and MVPs are used to quickly and efficiently produce a bear-bones, but workable app, intended to be enhanced upon after being brought to market.

In the future, we’ll cover how to figure out which development style will work best for you.

App Store Optimization and how users engage with the App Store

App Store

App Store Optimization (ASO) is crucial to your app’s chance of success. Just like SEO, ASO relies on utilizing keywords that users regularly search for, which are then paired with your app’s total downloads, user retention, user ratings, and user reviews, which culminate to form your app’s ranking in the App Store or Google Play. Apps with higher scores in these categories will be listed above lower-scoring apps during searches, giving them access to a wider audience.

Most app downloads come directly from the App Store’s search function. The two largest discovery channels in the App Store are the search function, coming in at 20%, and word-of-mouth, coming in at 15%. This exemplifies the importance of both keywords and UX, as users are much more likely to recommend an app to a friend if their experiences using the app are positive, as opposed to negative or even mediocre. Interestingly enough, negative word-of-mouth spreads much faster than positive, doubling the importance of your app’s UX.

In our How to Build a Mobile App: The Ultimate Guide, we’ll spend a lot of time covering ASO best practices, pitfalls, and proven user acquisition and retention strategies.

Usage, keyword, and design trends

User trends

Your app’s ranking, design, and user experience aren’t set in stone. Trends can make or break your app’s growth, so knowing the resources and options available to you in order to stay at the crest of these trends is crucial to your app’s success.

Your customer’s usage patterns will morph based on a plethora of factors, from simply-recognized time-of-day patterns to seasonal usage patterns influenced by weather, or even geographical differences. For example, productivity apps are used more during the day, while mobile games are used more during the evening. An app that tracks waves for surfers to catch will perform well in costal areas, while a snow-plow service app would perform better in cold regions during the winter.

ASO is ever changing – for example, certain keywords (especially those that are holiday related) can perform better during certain seasons, and should be implemented only at particular times. Keyword trends are forever changing, and it’s imperative to keep up with those trends to maintain your audience’s engagement and growth.

Even the design of your app is expected to change over time – mobile devices are constantly improving and changing, and your design must follow suit to compensate with larger screen resolutions and more powerful processors. There are trends in mobile design as well, which evolve frequently, and paying attention to the UX innovations of your competitors can give you an edge on how to do it better (simpler is always better), and stay up to date.

In the future, we’ll go into more detail about the methods and resources available to help you stay on top of upcoming keyword and design trends.

How to measure, grow, and ensure your app’s chance of success over its lifetime

App Growth

There’s never a fool-proof method to ensure a 100% success rate with any app, let alone any facet of life, but there are tools and options available to you to help ensure your app is successful in the marketplace.

There are tons of analytical services to choose from, ranging from touchscreen heat mapping and user session tracking and recording, to crash monitoring and realtime alerts.

If you’re keeping up with your ASO, and providing users with regular updates to stay on top of trends, you’re already headed in the right direction. Partnering with the right developer can spell either the success or failure of your app as well, so knowing how to shop for and speak with development teams is a crucial step in providing yourself with a stable foundation to build upon.

Over the next few months, we’ll dive deep into all of these topics, covering app creation from start to finish. Next week, we’ll cover tips on how to be a successful appreneur.

Why Custom POS Apps Are More Effective Than Legacy Systems

Virtually all restaurants use some type of point-of-sale (POS) system. Many systems are commercially available, but restaurant owners can also build their own POS apps for mobile devices.

The initial cost of developing an app is often offset by their long-term advantages over legacy systems like Aloha. Long terms benefits of POS apps for mobile devices include:

  • direct cost savings
  • customization
  • greater security
  • improved customer support

Costs

A custom POS app can incorporate the latest innovations in software technology, whereas legacy apps are primarily technology vendors.

Developing a new app allows you to invest in new technologies, features and security measures, while legacy POS systems primarily invest in services such as support contracts and upgrades. These services typically account for the majority of the cost of using a legacy system.

Although there is an upfront cost associated with custom apps, you actually own it once it’s developed. Legacy systems usually have an initial cost as well as a subscription fee that can cause the total cost of ownership for a commercial POS system to exceed the development cost of a custom app.

Developing an app specifically for the Android mobile operating system (OS) is less expensive than porting it over from another OS since Android has an open source.

Furthermore, a legacy POS system’s functionality doesn’t increase over time unless you pay for an upgrade, which may not provide any benefits for your business. You only pay for the features you need when you develop a custom app, allowing it to contribute to both the short and long-term financial success of your business.

Customization

Restaurants can vary greatly in their method of operation, from dedicated food service to businesses that provide other services such as cafes and nightclubs. This variety means that there is no single POS app that can meet the needs of every restaurant, which makes customization especially beneficial for these businesses.

Restaurants often require unique setups for their POS systems due to the range of possible hardware, menu configuration, and workflows. The increasing need to make changes in a POS system quickly also means that it’s more likely to be hosted on a cloud platform rather than a web browser’s backend. The right permissions on a cloud account allow you to manage your restaurant at any time and from any location so long as you have internet access.

Additionally, a cloud platform eliminates the need to update the POS system for each device individually. Changes to the system can be synchronized across multiple devices automatically, without the need for downtime that legacy systems typically require for updates.

The customizations needed in restaurant POS apps also include changes made by staff members, including…

  • changes in the specials
  • changes in item availability
  • end-of-day closeout
  • item modifiers

Customized apps can improve communications between the front and back-of-house operations by sending orders directly to the kitchen display while providing the appropriate notifications to the servers. This capability can lead to a one-house system, which is still quite rare for restaurants.

Additional customizations for POS apps include the ability for staff members and managers to provide guest experiences and other comments on individual orders.

Security

The primary security concern for POS systems is that they collect payment card information, so they need to comply with Payment Card Industry (PCI) regulations. A PCI-compliant POS app is therefore essential for protecting the personal information of guests.

Legacy systems that reside on a desktop fall out of PCI compliance periodically due regulatory changes, and the time needed to update these systems can be substantial due to their large size. These are also more vulnerable to malware, storage limitations and frequently send unencrypted credit card data to a local server.

Custom POS apps can encrypt sensitive data before transmitting it over a secure network and storing the data on a cloud-based server, thus avoiding the risk of an on-site data breach without sacrificing convenience.

Blind closeouts are another security feature that you can obtain with a custom POS app, which requires employees to reconcile cash at the end of their shift without knowing the amount they should have.

A cloud-based approach also makes it easier to integrate a POS app with other systems such as online ordering, gift cards, and customer loyalty programs.

Support

Legacy POS apps typically lock you into their customer support system with contracts that are difficult to break. These contracts make it hard to switch apps because you don’t want to lose the money you’ve already spent on support, even if you’re not in love with the system.

On the other hand, a custom app makes technical support easier because the same team that developed the app often provides the support, including installation and services.