How much does it cost to implement push notifications? – with Kumulos

Push notifications are a fantastic and proven strategy used to increase both user engagement and user retention – but are they worth the cost?

The short answer: most of the time. But let’s get into the reasons why.

The cost of implementing push notifications

Let’s start with the lowest cost option first – sending out push notifications on your own. In order to do this (at least for iOS), you’ll need to:

  1. Sign up for an Apple Developer Program Membership ($99)
  2. Set up a push notification certificate for your app ID (which you’ll get when you sign up for an ADPM)
  3. Download a push notification app from the App Store
  4. Set up a server from which to send push notifications to your users’ devices (costs for servers vary, and largely depend on your data loads)
  5. Use callbacks in the app to receive and handle push notifications

You should note that for iOS users to receive your push notifications, they must opt-in. For Android, it’s the opposite – users are automatically set up to receive push notifications when they download an app. Because of this, Android apps see a much higher opt-in rate than iOS – 91% compared to 43%.

Keep in mind, however, that iOS users tend to engage with apps more than Android users do. In addition to this, users who opt-in to push notifications engage with apps 88% more than those who don’t.

Also remember that just because you’re sending out push notifications yourself doesn’t mean that it’s free – if you’re the CEO of your company, you’re using your own time. If an employee of yours is sending them out, they’re using their own time – and time is money.

Sending a push notification, no matter if you’re supplying the backend infrastructure, is never truly free of cost. There’s also one glaring issue with sending out push notifications yourself – you lack the ability to study your push notification analytics.

Implementing push notifications through an analytics platform

If you’re invested in making a successful app, you’re most likely going to use an analytics platform in order to, well, analyze how users engage with your app. If you use these types of services, they might just have their own push notification service.

While this does cost more than sending out the push notifications on your own, successfully running an app without the support of an analytics platform is nigh impossible. So if you’re already utilizing a service like this, you might as well make the most of it.

There are a lot of analytics platforms, but we prefer Kumulos. A major reason for this is because through their platform, you can schedule, send out, and analyze your push notifications – as well as create segmented campaigns.

Bringing your analytical capabilities and your push notification campaigns together has an extra bonus – you’re able to study patterns of user behavior (like the day of the week, or hour of the day) that a user is most likely to open up your app. If they didn’t open up your app at their usual time yesterday, send them a push notification with a message that serves as a gentle reminder for them to engage with your app.

Now, we’ve stated this before, but we’ll say it again: it’s incredibly important to keep one fact in mind when sending out a push notification – you are interrupting your users’ daily lives. It’s the digital version of being handed a flier while you walk down the sidewalk – or being asked to write down your signature for a cause.

That’s why there are four key factors behind successful push notifications:

  1. Targeted
  2. Immediately beneficial to your users
  3. Attention-grabbing
  4. Billboard rule (less than ten words, ideally 7)

If your push notifications fall into the realm of “sales-y,” you actually run the risk of decreasing your app’s user engagement, and increase the chances of users abandoning your app in favor of one that doesn’t annoy them.

Bob Lawson, Founder, Kumulos says, “We 100% agree that push notifications are worth it, when done correctly. It’s far less expensive to retain existing app users than work on acquiring additional users. Having the ability to analyze the results of push notification campaigns is key to driving successful outcomes for any app.”

If you’re using a platform like Kumulos to both analyze user behavior and send out push notifications, you’re more likely to find the sweet spot between grabbing your users’ attention (for their own benefit), and interrupting them (for the benefit of your metrics). Users can easily tell which category your message falls into – and they’ll react accordingly.

This is why, even though it costs more (at least initially) to subscribe to an analytics platform with push notifications capabilities, it’s ultimately more economical to do so than going the “free” route.

Targeting the needs of your users, and providing them with a pertinent CTA is how you increase your user engagement. Shouting into the void, or asking your users to do something for your app while providing no benefit in return is how you lose users.

Here’s an example of a bad push notification:

Hi! This is _______! We’d love it if you could review and rate ______, the app you love, in the app store! Here’s a link to share us on social media: [link]

And here’s an example of a push notification that accomplishes the same thing, but in a way that’s beneficial for both your app and your users:

One month free for rating ______: [Link]

Now, that might seem like a low effort sales pitch, but what’s less of an interruption? “Here’s the thing,” versus “Hi! Here’s this great thing we’d like you to know about! If you want to act upon this thing, visit here!”

The second example also provides users with an immediate benefit: “one month free.” Don’t bury the lead.

There are other strategies for getting the most from push notifications, namely Proximity Marketing. If you’d like to learn more about that, check out our guest blog from Kumulos’ Caroline McClelland.

The last thing we want to cover is that sometimes push notifications aren’t the best way to go about increasing your user engagement and retention. Like anything in this world, context is key to success.

Understand how your users’ interact with your app, and if that interaction could receive benefit from push notifications. If there’s no benefit they could provide your app, don’t use them.

So, how much do push notifications cost?

As much as you want them to. Just remember; the more investment you put into analyzing your users’ needs and usage patterns, the more targeted (and segmented) of a push notification campaign you can make – which in turn results in better responses to your push notifications.

Don’t be the seedy car sales representative. Be the friend who wants their friend group to know about the cool thing.

How much does it cost to add a GPS & mapping API?

How much does it cost to include a GPS and mapping API in your app?

Depending on what you want your app to achieve, the answer can vary drastically. It also depends on the API you want to use, the type of app you’re making, and the functionality you want your map to provide.

Let’s go over the cost of some of the more popular GPS and mapping APIs, starting with the most well-known of all:

Google Maps

First of all, if your app is free (as in no cost to download, no ad revenue, and no subscription fee) Google Maps is free to use. This includes all of their API’s functionality – directions, routing, street view, and all the other functionalities.

Google Maps also provides app developers with the ability to customize their map – this includes colors, information presented, and much more. The customized map can then be copied as simple Javascript to be implemented into your app – this works with both Android and iOS platforms.

Google Maps’ costs are as follows:

  • Embed Advance: $14 per month
  • Static Maps: $2.00 per month
  • Dynamic Maps: $7.00 per month
  • Static Street View: $7.00 per month
  • Dynamic Street View: $14.00 per month

For more information, visit Google Map’s pricing page.

Keep in mind that even if you’re on a free plan for Google’s API (or any API for that matter), it still takes time and costs money for developers to implement that API into your app. Most APIs also require a backend through which they access data, which adds to your costs. Backend service pricing varies wildly.

USE OUR APP COST CALCULATOR TO ESTIMATE THE COST TO BUILD YOUR APP

Mapbox

Another GPS and mapping API, Mapbox is free-to-implement as long as you stay below the magic number of 50,000 views/requests/users a month. Mapbox gives developers the ability to provide users with real-time navigation, augmented reality, and data visualization. Their API is customizable, and their tools for visualizing data can be used on the web, mobile, and desktop.

If you go over that magic number of 50,000, the price moves up to fifty cents per 1,000 map views, geocoding requests, directions requests, matrix elements, and Tilequery requests. If you’re building an enterprise app, you can get a volume discount if your numbers are over 5 million for the same categories.

Mapbox can be implemented for both Android and iOS apps.

For more information, visit Mapbox’s pricing page.


SCHEDULE A CONSULTATION WITH AN APP DEVELOPMENT EXPERT TO GET A CUSTOMIZED QUOTE!

Tom Tom

Tom Tom is yet another mapping API – rather than providing a pricing plan based on interactions per month, Tom Tom offers you 2,500 API transactions on a daily basis. This number is reset each day. Keep in mind that a transaction isn’t a user opening your app, using the map functionality, and then closing it. For their maps API and traffic tiles, one transaction is equal to fifteen requests.

If you’re going to go above those 2,500 free transactions per day, you can check out Tom Tom’s pricing page here. For 50,000 transactions, the price is $25.00, and for ten million the price is $4,199.00 – as you can see, depending on how many users you expect, your costs can vary significantly.

So just what are GPS and mapping APIs?

First, let’s cover the basics – API, just in case you aren’t familiar with the acronym, stands for Application Programming Interface. Basically, an API provides a developer with set of functionalities and protocols that define how pieces of software interact with each other.

In regards to an what an API call (also referred to as an API request) is, it’s essentially a piece of software in an app connecting to a server in order to transmit data between the server and the app. This is all made possible by backend integration.

This is how GPS and mapping APIs are able to update users with directions, or can display (and react to) traffic conditions. Every time your users interact with the mapping API your app uses (for instance, finding the nearest gas station) they are guided by directions that are provided by multiple API calls.

The app communicates to the server where it is, and the server uses that data to correctly display the next step in their route. This process is continued until the user has reached their destination.

This is why most GPS and mapping APIs offer different options from which to mix and match – and why you should choose which features you want to include carefully. While mapping APIs are designed to scale with your usage volume, they do become more expensive as your user base grows.

It’s always easier to add functionalities than it is to take them away – your users will be disappointed and dissatisfied if they notice a feature that was available to them is no longer there.

That’s why we recommend starting out your app as an MVP.


How (not) to build an app with Appy Pie

There’s something to be said about making something yourself, whether it be a meal or a piece of art. There’s nothing like coming up with an idea and executing it from inception to completion, all on your own.

For the self-driven individual, an app WYSIWYG (What You See Is What You Get) editor sounds like a dream – they can work pretty well for websites, so why not apps? Wouldn’t it be cheaper to make it on your own anyway?

It makes sense that a service like Appy Pie would be tempting for any appreneur with an eye for design and a small budget – or maybe a CTO in the same situation. But – and this is my honest opinion – I think it would be easier to design an app in Sketch, prototype it in Invision, teach yourself Swift, and build in Xcode, than it would be to create a successful app using a service like Appy Pie.

I have come to form this opinion because I tried to make an app using Appy Pie. I originally intended this to be a fairly benign chapter of our How to Build a Mobile App: The Ultimate Guide, detailing the best options to use and a short how-to guide for the appreneur who does not have the funding to hire an app developer; but almost as soon as I started testing the user experience of Appy Pie, I knew that wasn’t going to happen.

Because; skipping (for now – I’m going to get to these later) the un-organized creation system, limited options, and inescapable cookie-cutter feel – it’s not you making your app. It’s Appy Pie.

Now, I feel like I need to put a little disclaimer before we go any further; I don’t hate you, Appy Pie. This isn’t a vendetta against you personally. It’s just WYSIWYG doesn’t work with app creation. This isn’t even really about Appy Pie – it’s about any service that provides a way to make apps without coding them.

Making an app with Appy Pie

Appy Pie

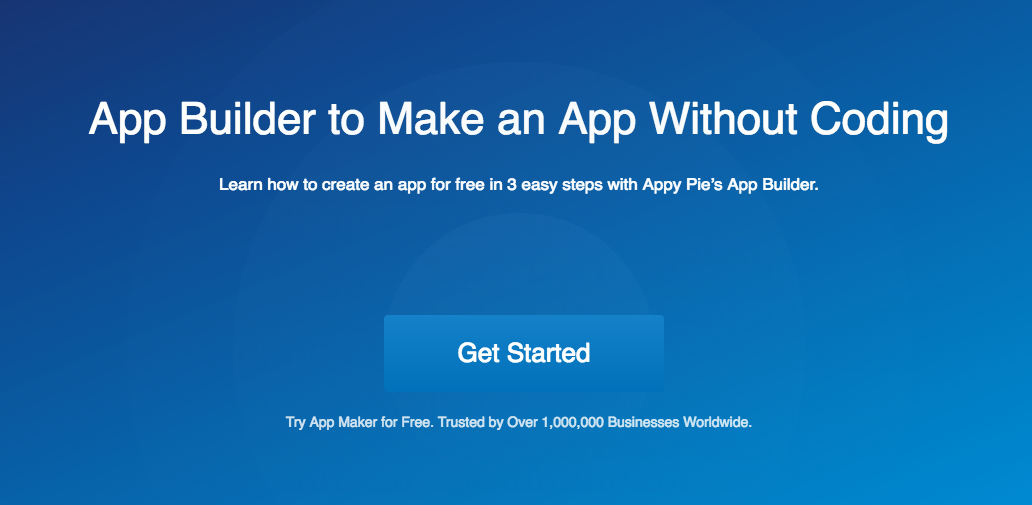
At first, I was intrigued. “Create an app for free in 3 easy steps? That sounds awesome!” I was interested in how it would work; I had built a website that didn’t need to accomplish much using a WYSIWYG creator in my first year of exploring web dev, and it had honestly taught me a few things, and the site really wasn’t half bad (for what it was intended to do). So, I had hope that there would be an equivalent for apps..

What I’m trying to say, is that I went into this with an open mind; I didn’t intend to write a piece touting the benefits of hiring a mobile developer over using a service like Appy Pie. It’s just how it naturally transpired.

Appy Pie

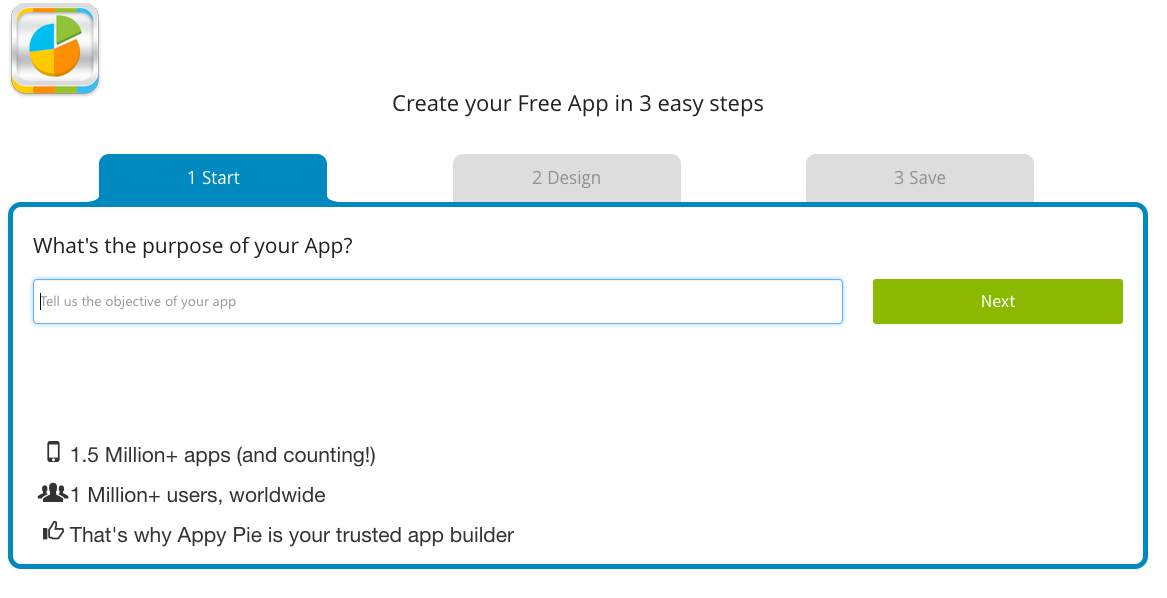
One of the first questions Apps Pie asks is on point: What’s the purpose of your app? As we’ve gone over in the past, knowing the purpose of your app is one of the most important questions to answer before doing anything else. At this point, I was hopeful.

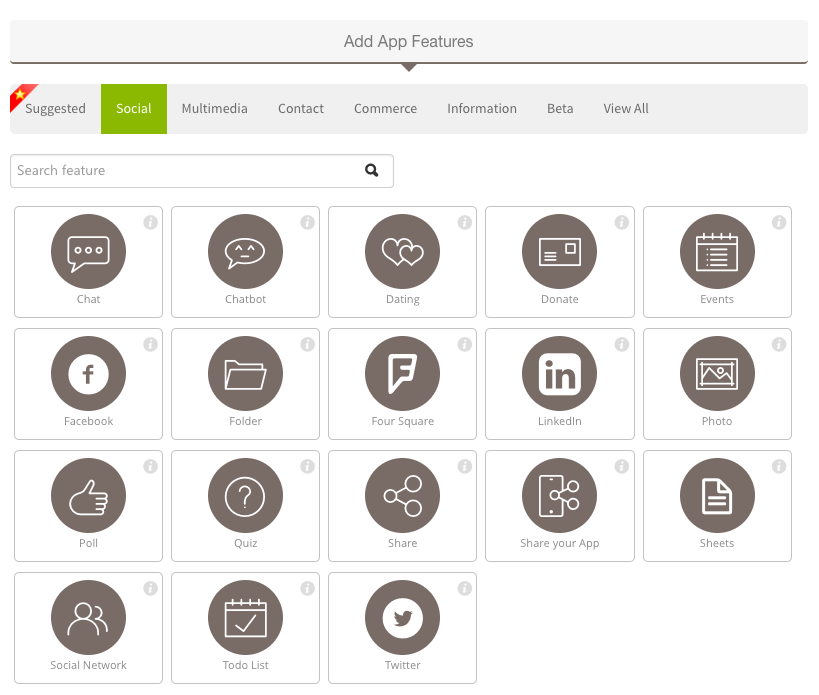
And then came “Step 2.”

Appy Pie

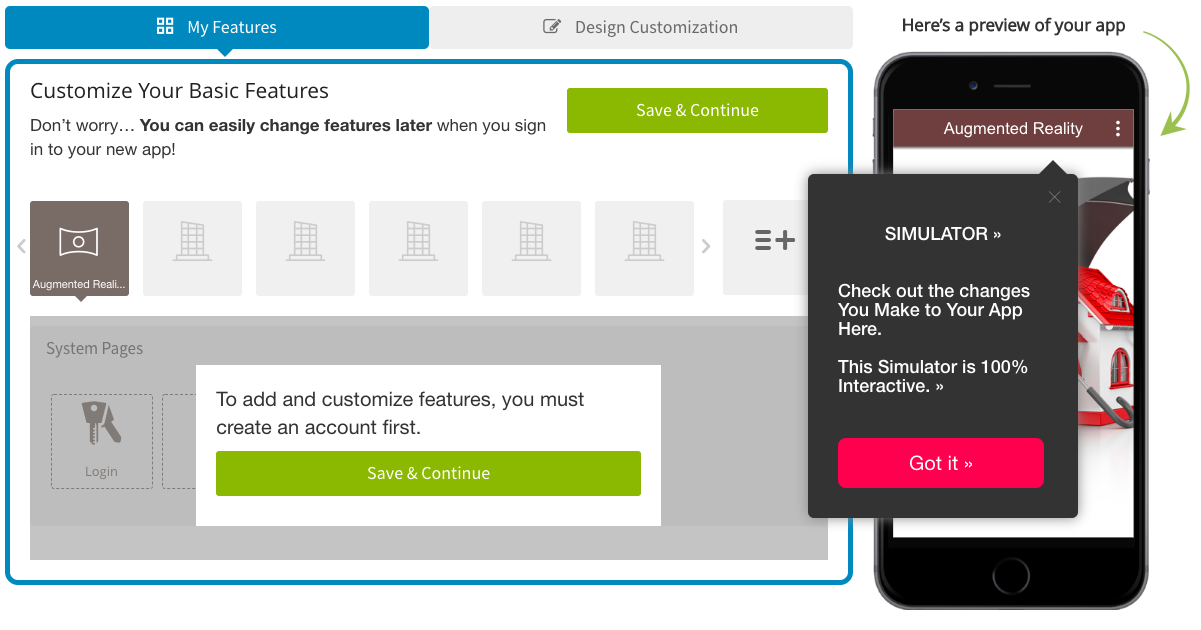
This is where it all starts to fall apart. The above screenshot is what you’re greeted with, and while Appy Pie’s UI is pretty straightforward to navigate, I found it extremely difficult to visualize what I was creating. Now, not every app developer has the same process, but a simplified overview usually looks like this:

  • Designing the UI in Sketch
  • Planning the flow in Invision
  • And then coding based upon the Invision file

Appy Pie seems to take this process and condense it into one step. While this may seem like the service has just streamlined the app building process, they’ve instead muddied the waters. There’s a lot to keep track of when planning and building an app, and one scrollable list isn’t the most efficient way to go about it.

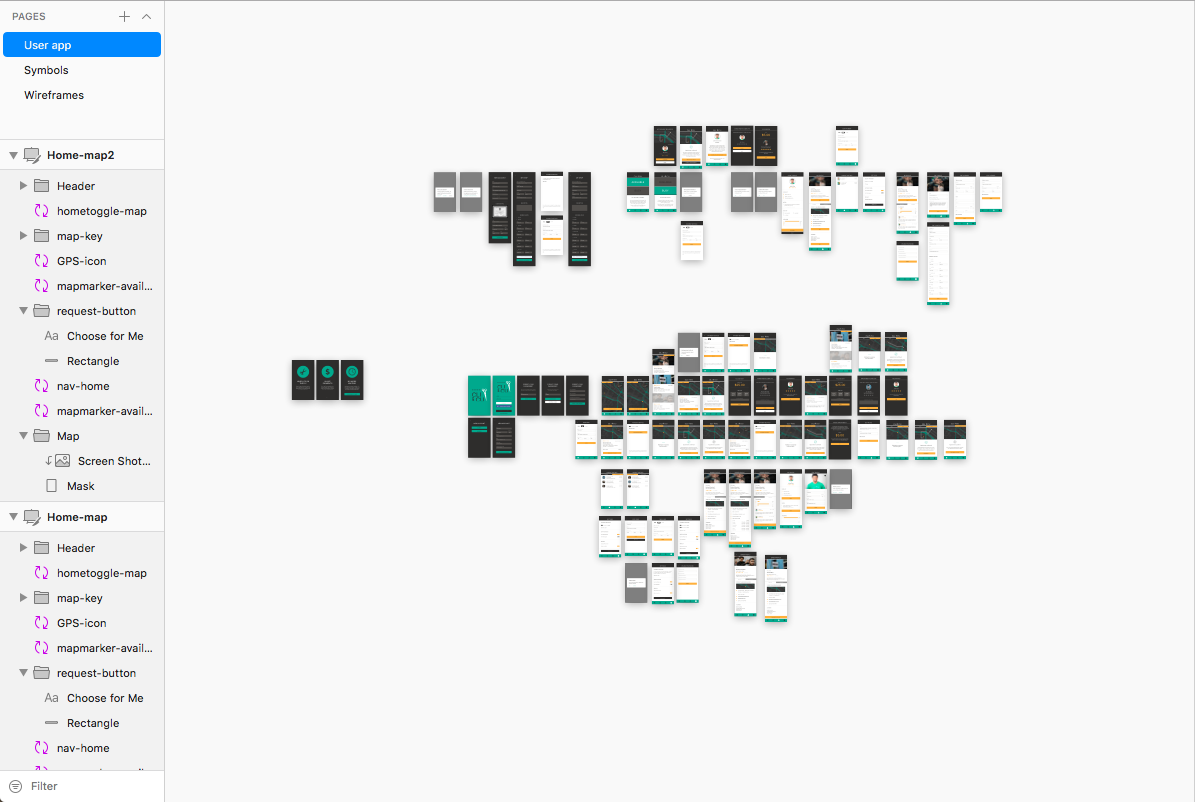
Take, for instance, what an app’s UI design looks like in Sketch:

Sketch

Every rectangle you see above is the design for each screen of a single app. These screens are then put into Invision and linked together to plan out the app’s flow and UX. During the design and prototyping phase, our UI/UX team gets into the nitty gritty details of each screen, working in tandem with our programmers to determine everything from screen transitions to the exact pixel dimensions for each button, field, and image.

Our developers can then take the Invision file, and code based on that – providing them with easy access to all the necessary information, from hex colors and fonts to UX and flow.

Now, imagine doing all of that, but with this UI acting as your tech doc, your design editor, your prototype, and your code:

Appy Pie

Yes, it’s visually simple. But take a look at that Sketch screenshot again. Now imagine bringing that level of detail into a system like Appy Pie’s. This system condenses the intricate and detailed process of creating feature sets, UI/UX design, and app flow into:

  • Choose feature
  • Design feature
  • Choose another feature
  • Design that feature
  • Repeat ad nauseam

This is a great way to produce an unorganized app. It’s akin to not only building a house without a blueprint – but building a fully functional and furnished kitchen with plumbing, appliances, lighting, table and cabinets, and a coat of paint – and then moving on to the living room’s wooden frame. Doing this, it’s unlikely you’ll build a structurally sound home.

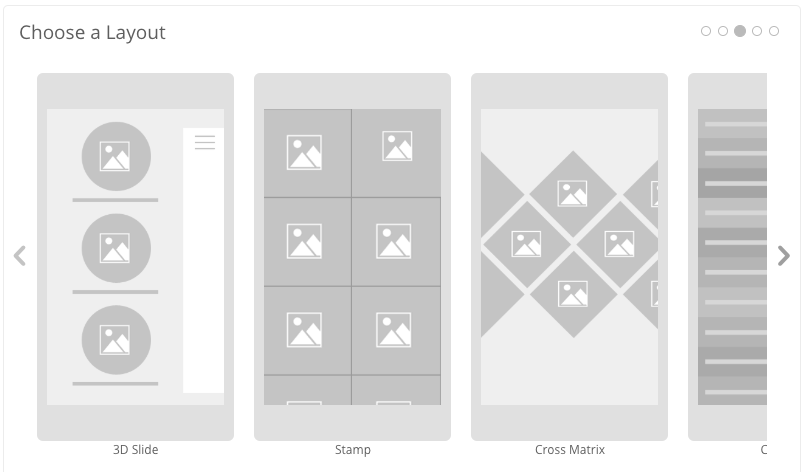
This isn’t even mentioning the cookie-cutter feel this system is sure to produce. Take a look at the options given to you for layout and design:

Appy Pie

Appy Pie

With limited options and methods of implementation, your app is bound to feel just like someone else’s.

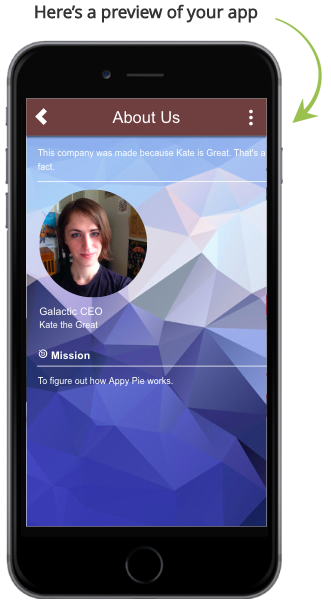
This muddied method for app creation has another negative compounding factor: You don’t know how anything fits together. Sure, “Step 2” has a live preview of each page on the right side of Appy Pie’s UI:

Appy Pie

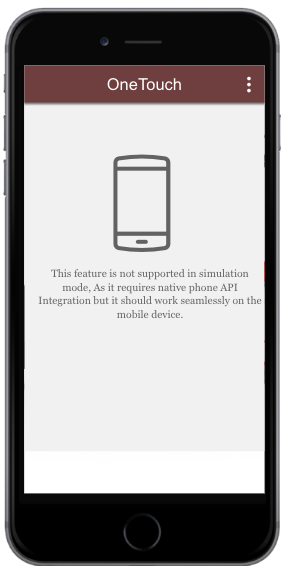
But all too often, I would be met with this message:

Appy Pie

Which brings us to development cycles. We’ve covered some dev cycles before, but overall, most developers will use what’s called agile. Basically, the steps to an agile development cycle are as follows:

  1. Identify and set goal for issue
  2. Work on issue
  3. Meet up after a set amount of time to discuss and test process on issue
  4. Iterate until complete

This process can take anywhere from a day to two weeks, and it largely depends on the developer – but (and this is a very important but) – each issue (another word for feature) is tested independently before it’s implemented. This is because (as we’ve covered in our Swift development piece) programmers will build their code in a branch, test that branch independently from the rest of the code, debug, and then merge their branch with the master branch.

This serves two very important functions: compartmentalizing bugs, and reducing the risk to the overall codebase. It’s much simpler to look over 100 lines of code and find the problem with your app than it is to look over 10,000 lines. By testing each feature by itself, developers are able to cut down on overall time spent testing the app – measure twice, cut once.

And this is where things really start to go downhill. I had made a gallery linked to my Flickr account, and I wanted to test it on a phone to see what it would actually be like to use this app on a device. So, I downloaded the app, and this is what I saw:

Appy Pie

Honestly, not bad. All the work I had to do was select the grid layout, and I had played around a bit with some of Appy Pie’s default backgrounds. The scrolling, albeit a little janky, worked, and switching between the “Donate” and “Photo” bottom menu options worked. There were a few problems though – scrolling just stopped loading new images after a certain point, and I wanted to take away the “Sets” tab, along with changing the typeface the gallery used.

So, I set those as goals to fix – much in the same way developers will test, find a bug, and fix it. I went back into Appy Pie to edit the gallery, and I was met with this:

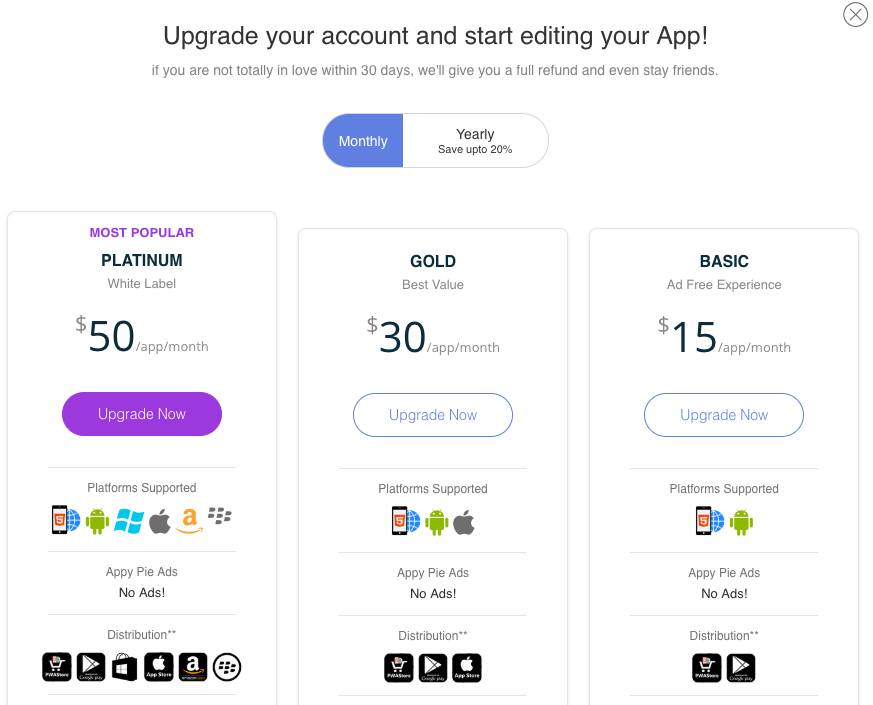
Appy Pie

I couldn’t edit. I had downloaded the app to a device in order to test a feature set, and I couldn’t make changes (not until I paid, at least) based on my findings from testing.

How to make an app with Appy Pie: v1.1

With this newfound information, I present the fool-proof guide on how to make an app in Appy Pie “for free in 3 easy steps”:

  1. Make an Appy Pie account
  2. Design, plan, and implement your entire app all at once (perfectly too, no testing allowed)
  3. Publish your app

It’s just that easy!

When I started researching Appy Pie’s service, I really didn’t expect to end up writing something with as much snark – but my plan was forced to change. I tested an outline against my actual experience, found they didn’t work together, and then edited the outline to make it fit with what actually happened. A process Appy Pie can’t seem to replicate – for free, at least.

There’s so much more to a successful app than just making it too; ASO is a huge factor for your app’s success. For any sort of analytics, you’re paying $50 per month per app, and that app can only be stored on a maximum of 600 MB of space.

There are entire companies dedicated to analytics and building keyword campaigns for apps, and when you build an app with Appy Pie, you’re expected to do all of it yourself, while paying a platform for allowing you to do so.

If you’re a self-driven individual set on making your own app, we think that’s great. Our senior Swift developer is self-taught, and we believe some of the best coders come from the evolution of hobbyist to professional – but keep in mind, if a service’s “Create an app for free in 3 easy steps” claim seems a little too good to be true, that’s because, more than likely, it is.

Android vs. iOS – How do I decide which platform to launch on?

This is a question we covered a bit in our piece about how to find a mobile developer, but I felt like there was more to talk about; we were recently discussing in a meeting why some clients seem to favor one platform over the other, and what the benefits are to launching on iOS versus Android.

First, I think it’s important to distinguish what I mean when I say platforms – this isn’t just limited to Android and iOS, after all. There’s other facets of these OSs; AppleWatch and AppleTV; while Android is currently supported on SmartTVs and wearables like the MOTO ACTV, and is already making headway with smart glasses, home appliances, cars, and even SmartMirrors. Apple itself is of course supporting their own ventures into these new implementations of smart tech, with their own projects like Titan, for example.

But how do you decide what platform is best for your idea? Before we get into the what the future holds for Apple, Android, and all the other tech giants, let’s get a clear picture as to what the current field looks like today:

Just the facts

  • In the U.S., Android owns 54.6% of the market, and iOS owns 44.4% (Android is the top performer globally)
  • More iOS users download purchasable apps than Android users (11.82% vs. 5.76%)
  • iOS apps have a higher retention rate than Android (1% to 3% higher)
  • Android has a lower publishing cost than iOS (Android has a one-time-fee, iOS is yearly)
  • iOS development is cheaper than Android (by about 30%)

A few things to keep in mind: Android’s market share, while larger than iOS, is skewed by the fact that Android comes with many pre-paid phone options, while there are no pre-paid iPhone options. While the larger percentage of market share should indicate apps that are hosted on both Google Play and the App Store would see more total downloads from Android users, we have, in fact, witnessed the opposite.

Three apps that we have published to both the App Store and Google Play are the perfect example of this. Out of these three apps, one has an audience centered in the U.S., one is centered internationally, and one has an audience split almost evenly between the U.S. and international markets.

  • The app with users mainly from the U.S. has seen 76% of it’s downloads come from iOS users.
  • The app with mostly international users (remember, Android boasts a very high market share internationally) has seen 46% of its downloads come from iOS users.
  • The app with an even split between U.S. based and international users has seen 65% of its downloads come from iOS.

As of Q4 in 2017, Google Play hosted 3.5 million apps, while the App Store had an offering of over 2 million. Users have downloaded apps 19.2 billion times from Google Play, and 8.2 billion times from the App Store.

iPhone users tend to be younger (by only a few years, but still a noticeable difference), and are described as “power users,” meaning they engage with more categories of apps more frequently, and on a regular basis, when compared to their Android counterparts. While iPhone users are more likely to engage with apps than Android users, they also represent a smaller audience when compared to Android.

A question you should ask yourself (and this is largely dependent on what type of app you’re making) is: what is more important for my app? Reach, or engagement?

iPhone users are more likely to engage in “m-commerce” (online purchasing through their mobile device), and are also more likely to retain their position as Apple customers, as 80% of iPhone users have perviously owned another iPhone.

While iPhone users tend to favor retail and social media, Android users tend to gravitate towards (and purchase more frequently) utility and productivity apps. iPhone users tend to value simplicity and consistency, while Android users place great import on the customizable nature of their apps; likewise, iPhone users usually identify as extroverts, while Android users are mainly introverts.

These findings, of course, are not set in stone – there are most definitely introverted, low-engagement iPhone users just as there are extroverted, high-engagement Android users; some Android users exemplify the epitome of brand loyalty, while some iPhone users are disillusioned by their experiences with iOS.

But the trends are noticeable, and when deciding which platform is most important to focus on, this is data that should be considered carefully.

For more information, check out our Android and iOS dev pages.

Development options

Android vs iOS Development

As we’ve discussed previously, it’s always better to develop your app natively. This does come with one main detractor, however; cost. A great way to offset this is by focusing on one platform initially, and using the MVP model of development. We believe the best platform for an MVP is iOS, mainly due to the platform’s high user engagement. Since users are more likely to engage with, and spend more time using their apps, iOS early adopters provide higher quality feedback than Android.

In fact, one of the most successful apps on the market today, Snapchat, has mainly focused on developing their app for iOS. Now, with the benefit of a (much) larger budget, they are bringing Android up to par with their iOS version.

This is not to say that Android apps won’t work as MVPs; rather that iOS user behavior lends itself to the user engagement necessary to build a successful MVP.

The future of apps and their platforms

There’s no way to be sure what advancements in tech will look like, and predictions about the future rarely come to fruition as we expect, but there is one trend that has remained throughout the explosive growth of the internet of things; people use more, want more, and expect more.

If you’re in the ideation stage of app development, consider what you’d like to see happen. Wearables are expected to represent a $34 billion industry by next year, and right now, mainly focus on health and fitness apps. As of now, in 2019, AppleWatch is the leader of the pack when it comes to smart watches, but this could very easily change.

Android, and Google, by proxy, have cast a very wide net when it comes to exploring new avenues for devices through which to engage users, and Apple, like usual, tends to focus in on a few products to perfect.

There’s no right or wrong platform for any app, but there’s sometimes a better fit. Like any venture, it’s important to do your own market research, and plan based on your own findings. For any appreneur or CTO, the best steps you can take to build a successful app is to know your competition, know what makes your app different, and to do it better than anyone else.

How to Build a Mobile App: The Ultimate Guide

It’s no secret that smartphones are quickly becoming intrinsic multi-tools that enhance our productivity, our access to information, and pretty much everything else in our daily lives. The meteoric rise of mobile devices is indeed a shake-up to an already volatile and new industry itself; it’s almost difficult to believe that mobile devices account for 63% of all internet traffic, a 6% rise from 2017.

Out of that 63% of mobile internet traffic, a whopping 90% was spent using apps. Just like the total increase of mobile traffic, app usage grew by 6% from 2017 to 2018 – a dip from the 11% between 2016 to 2017 – but still a significant amount of growth nonetheless, especially when accounting for certain app genres, like games, which are seeing users spending both more time and money on their interactions.

This is a trend that isn’t expected to stop any time soon, and if you’re an entrepreneur, or the CEO of a fortune 500 company, and you don’t have an app to enhance your business (or engage your customers), it’s time to get one.

Chapter 1: Native vs. Hybrid Development

Chapter 2: iOS Development and Swift Code

Chapter 3: How to find the perfect mobile app developer

Chapter 4: ASO 101

So, how do you go about making an app?

Building an app

Before we get into the intricacies of app creation, let’s go over what we’re going to cover in our How to Build a Mobile App: The Ultimate Guide.

  • The platforms available to you, and the code that makes them work
  • How to properly design your app
  • How to find and communicate with developers
  • Different types of development
  • App Store Optimization and how users engage with the App Store
  • Usage, keyword, and design trends
  • How to measure, grow, and ensure your app’s chance of success over its lifetime

For the next 22 weeks we’re going to dive deep into every facet of app development, from the very basics and first steps, to user retention and acquisition strategies. This is the How to Build a Mobile App: The Ultimate Guide after all, so strap yourself in for a five-month-long ride down the app creation highway.

For now, here’s an introduction to each topic:

The platforms available to you, and the code that makes them work

Mobile Platforms

When it comes to platforms, there are two main players; iOS and Android. Each has its own benefits and drawbacks when comparing the two – iOS provides greater stability and Android allows for more customization.

Apps that run on iOS are programmed using Swift, the most current iteration of the language being Swift 4. Swift can be used to code for iOS, macOS, watchOS, and tvOS. This is handy, as it gives you the ability to code for all Apple products while only requiring the knowledge of one language, but it limits your potential audience.

When programming for Android, there are many languages available to you: Java, C and C++, Go, and Kotlin – the most popular being Java. Android is open source, which gives you free reign to modify and distribute Android’s code at no charge. Android is used on a wide variety of mobile devices, which gives you the potential to open up a greater range of revenue streams, but this can also slow down your app’s development.

When it comes to choosing a platform for your app, there isn’t a right or wrong option – and frequently, the best answer is both. In the future, we’ll be looking more into the intricacies of developing for both iOS and Android.

How to properly design your app

App Design

App design is like butter on toast; not enough, and you’re in for a bland experience – too much, and you’re not sure whether you should eat it or throw it out to give your arteries a break. Due to user experience (UX) being so entwined with user retention and acquisition rates (as well as user ratings) an app’s design can make or break its chances of success.

Design trends are changing all the time, so it’s important to update your app to not only keep it secure, but to also ensure it stays relevant. User reviews are a great source to pay attention to when planning your app’s design – but always err on the side of caution when designing your app – if you can scrape some butter off of that toast without sacrificing flavor, get rid of the unneeded butter.

In the future, we’re going to cover app design principles from the ground up.

How to find and communicate with developers

Finding App Developers

There’s a multitude of developers out there, so how do you figure out which one is the best for you?

Rather than searching Google, it’s best to start with Clutch. Clutch is a website dedicated to providing a platform for entrepreneurs and businesses to search for developers that fit their specific needs, and is a great resource for vetting teams when deciding on a development partner.

As we cover development pitfalls and best practices, we’ll go into detail about how to ensure time spent building your app is never wasted, as well as tips on how to communicate effectively with your development team.

Different types of development

App Development

There’s plenty of fish in the sea, just as there’s a myriad of methods to structuring and planning your app’s development. The most common are Skyscraper, Agile, and Minimum Viable Product (MVP).

In short, the Skyscraper method relies on heavy planning and market research, Agile focuses on utilizing an adaptive, responsive method of development, and MVPs are used to quickly and efficiently produce a bear-bones, but workable app, intended to be enhanced upon after being brought to market.

In the future, we’ll cover how to figure out which development style will work best for you.

App Store Optimization and how users engage with the App Store

App Store

App Store Optimization (ASO) is crucial to your app’s chance of success. Just like SEO, ASO relies on utilizing keywords that users regularly search for, which are then paired with your app’s total downloads, user retention, user ratings, and user reviews, which culminate to form your app’s ranking in the App Store or Google Play. Apps with higher scores in these categories will be listed above lower-scoring apps during searches, giving them access to a wider audience.

Most app downloads come directly from the App Store’s search function. The two largest discovery channels in the App Store are the search function, coming in at 20%, and word-of-mouth, coming in at 15%. This exemplifies the importance of both keywords and UX, as users are much more likely to recommend an app to a friend if their experiences using the app are positive, as opposed to negative or even mediocre. Interestingly enough, negative word-of-mouth spreads much faster than positive, doubling the importance of your app’s UX.

In our How to Build a Mobile App: The Ultimate Guide, we’ll spend a lot of time covering ASO best practices, pitfalls, and proven user acquisition and retention strategies.

Usage, keyword, and design trends

User trends

Your app’s ranking, design, and user experience aren’t set in stone. Trends can make or break your app’s growth, so knowing the resources and options available to you in order to stay at the crest of these trends is crucial to your app’s success.

Your customer’s usage patterns will morph based on a plethora of factors, from simply-recognized time-of-day patterns to seasonal usage patterns influenced by weather, or even geographical differences. For example, productivity apps are used more during the day, while mobile games are used more during the evening. An app that tracks waves for surfers to catch will perform well in costal areas, while a snow-plow service app would perform better in cold regions during the winter.

ASO is ever changing – for example, certain keywords (especially those that are holiday related) can perform better during certain seasons, and should be implemented only at particular times. Keyword trends are forever changing, and it’s imperative to keep up with those trends to maintain your audience’s engagement and growth.

Even the design of your app is expected to change over time – mobile devices are constantly improving and changing, and your design must follow suit to compensate with larger screen resolutions and more powerful processors. There are trends in mobile design as well, which evolve frequently, and paying attention to the UX innovations of your competitors can give you an edge on how to do it better (simpler is always better), and stay up to date.

In the future, we’ll go into more detail about the methods and resources available to help you stay on top of upcoming keyword and design trends.

How to measure, grow, and ensure your app’s chance of success over its lifetime

App Growth

There’s never a fool-proof method to ensure a 100% success rate with any app, let alone any facet of life, but there are tools and options available to you to help ensure your app is successful in the marketplace.

There are tons of analytical services to choose from, ranging from touchscreen heat mapping and user session tracking and recording, to crash monitoring and realtime alerts.

If you’re keeping up with your ASO, and providing users with regular updates to stay on top of trends, you’re already headed in the right direction. Partnering with the right developer can spell either the success or failure of your app as well, so knowing how to shop for and speak with development teams is a crucial step in providing yourself with a stable foundation to build upon.

Over the next few months, we’ll dive deep into all of these topics, covering app creation from start to finish. Next week, we’ll cover tips on how to be a successful appreneur.

The Hidden Costs Of Building Mobile Apps

Hidden Costs of Mobile App DevelopmentThe quick answer:

Hidden costs of mobile app development include the following:

Many of the costs to develop a mobile app are relatively easy to predict. Especially the upfront costs. But, app development also incurs costs that may not be apparent if you’ve never done it before.

These costs can be particularly troublesome when you’re in a committed project before you’re aware of them. At this point, the only practical solution is likely to invest additional money that may not be within your original budget.

The process of developing a budget for your mobile app begins with an estimation of the major, upfront costs. After this step is complete, you can begin accounting for the less obvious, long-term costs. Keep in mind that the hidden costs can sometimes be greater than the upfront costs, especially for a successful app.

Standard Mobile App Development Costs

The standard costs of app development include development and marketing:

Development Costs

The development costs of a mobile app include the interface, prototyping and testing.

The quality of the user interface (UI) and user experience (UX) are some of the first factors you need to consider when developing an app. You may choose a basic UI/UX that emphasizes functionality rather than appearance.

A medium-level UI/UX may have a greater level of detail, but may still look like many of the apps already on the market. A high-end interface will have a polished design with custom widgets that give it a unique look and feel.

A very simple app may not require prototyping, but most apps have multiple features, interactions, and integrations that make prototyping worthwhile. This process involves developing just enough of the app’s functionality to give developers a good feel for how the full version should perform. A typical prototype may consist of five fully developed screens.

Testing is an essential development phase for all apps. You’ll typically install the app on several devices to see how they function under real-world conditions. Native tools will be necessary to test the performance of native apps. This phase should account for 10 to 20 percent of the app’s total development budget.

Marketing Costs

You shouldn’t expect an app to sell well just because you’ve built it and uploaded it to an app store. Even if it’s better than similar apps already on the market, it will still need to overcome the brand loyalty of the existing apps’ customers.

A proper marketing strategy for a new mobile app can cost anywhere from $5,000 – $100,000 each month. Many small businesses also use Growth Hack techniques to experiment with methods of increasing their app’s popularity.

Hidden Mobile App Development Costs

The hidden costs of mobile app development include the following:

Back-end Hosting

The processes in a mobile app may be classified into front-end and back-end processes. Front-end processes include the interface and in addition to the code that accepts and displays information. The development of these processes is relatively easy to understand and include in the budgets.

However, you may not realize that most apps also require a back end to store and access the data that was obtained by the front end. An app’s back end may be a web service or Application Programmer Interface (API), which often must be hosted separately.

It may also take the form of cloud storage, which includes the full functionality of a web server or API. Either way, the app’s back end will incur a monthly hosting charge based on the provider and amount of storage the app requires.

Developer Account

App stores require developers to maintain an account that allows them to upload and store apps. The fees for a developer account are small compared to other development costs, but some of them are recurring charges.

For example, developer accounts for the Amazon and Apple app stores currently cost $99 per year. The Google Play store charges a one-time fee of $25, while the Windows store charges businesses a one-time fee of $99.

Operating System Updates

Mobile operating systems (OSs) are routinely updated with bug fixes, security patches and additional functionality. These changes frequently require developers to changes their apps, which can incur unexpected and highly variable costs. Updates that allow apps to take advantage of an OS’s added functionality may also be needed to remain competitive with newer apps.

In the case of bug fixes and security patches, the app may need to be updated just to keep it running safely. Much of an app’s maintenance budget should be devoted to keeping it secure. Once hackers learn of a vulnerability in an OS, they can quickly develop malware to exploit it.

These programs can impair an app’s functionality or even gain access to confidential information. Some security issues may also require the services of a specialized consultant to resolve them.

Consumer Feedback

Consumer feedback is an essential method of identifying ways an app can be improved. The major app stores all have the capability of allowing expert reviewers and regular users to provide feedback on apps. This feedback should result in many changes to an app, especially if it’s just been uploaded to the store.

New Devices

Mobile app developers are often surprised to learn that they will need to support additional devices. For example, a native Android app won’t work on an iPhone and vice versa. Developers who want their apps to use native capabilities will generally need to develop a separate app for each platform.

However, in some cases, it may be possible to develop a hybrid app that only requires minor tweaks to work on another platform.

Maintenance and Support

Developers must view a mobile app as an ongoing project that requires periodic maintenance rather than one that only requires a one-time investment. An app requires regular changes to retain its intended functionality and add the new features needed by its users. The cost of maintaining and supporting an app often exceeds its development costs.

Get A Detailed Mobile App Estimate

When working with a developer, it’s critical to work with a trustworthy, proven company that you can feel confident in. On top of that, you should still be as explicit and specific about your budget, your expectations and any other details surrounding the app you want developed.

Want to get a better idea of what your mobile app will cost to develop? Read this article: How Much Does It Cost To Make An App? or call us with any questions at 804-616-3546.

Why You Should Not Build an App for Free

don't create an app for freeHere’s a common situation in the app world: a person has an idea for an app and wants to move forward with it.

But, that person doesn’t have the financing to pay a developer or the application development chops to do it on their own. That leads folks to investigate the options for building an app for free.

There are really three basic options for building apps for free or at a nominal cost. These include:

  • Paying a developer with equity
  • Building an app with DIY tools
  • Learning how to write the code yourself

The first option – paying with equity – actually often results in a higher development cost over the long term when compared to hiring a professional developer. And the second and third options are often just farfetched, with many people starting down that path and realizing they don’t have the time or true desire to learn the programs and languages needed to build a reliable app.

However, if you’re dead-set on making your app a reality, you’ll probably investigate each of these avenues in more depth. So, we’ll walk through each of the options with you and help you understand why, in most cases, it’s best to avoid the “free” options for building your app.

Using Equity Shares To Finance Your App

You may be tempted to offer a contractor a share of your company in exchange for developing a minimum viable product (MVP) in addition to future support.

However, it’s almost always better to pay for the development up front, which should typically include at least six months of maintenance. If you don’t have this much cash on hand, you might consider applying for a line of credit to cover it.

Assume for this example that you wish to offer a contractor 5% equity, which is at the low end for developing an MVP. The cost of this service is typically in the range of $10,000 to $15,000, so this strategy only makes sense if you consider your company to be worth no more than $200,000 to $300,000.

Your company may be worth less than this if your idea is all you have to offer towards your company’s future success, even if it’s a good idea. On the other hand, your company is probably worth more than $300,000 if you can make other contributions towards success such as executive management, fundraising or sales.

Furthermore, a contractor is unlikely to provide future support if you’re only compensating them with equity. Assume the contractor agrees to provide development and support for two years, with the transfer of equity spread out over this period.

The contractor in this arrangement will have leverage over you and will be likely to ask you for more equity at some point because they’ll know you’re completely dependent upon them for technical guidance.

If you agree, you’ll give up more of your business. Even if you refuse, you’ll still lose out because the contractors can simply walk off with whatever equity they currently have, leaving you without the support you were counting on.

While 5% equity is a minimal figure for developing an app, it’s still more than the 1-3% that early-stage technical employees typically receive. That means you’re paying more to a temporary contractor than an employee who actually has a vested interest in your company’s success.

In this case, it would be better to give the equity to the employee who is dedicated to your company than a contractor who likely has other clients. Even though you’re also paying employees a salary, you will still get more buy-in from an early tech-hire than a contractor.

Another disadvantage of offering equity is that it keeps you from hiring the developer full-time. Even though you aren’t paying the contractor anything, you’ll almost certainly have to sign an iron-clad contract that prevents you from poaching the contractor’s employees.

Using DIY Tools To Create Your App For Free

Why You Should Not Build an App for Free

DIY tools like Appy Pie, ShoutEm and SwifTec allow non-programmers to develop mobile apps. While they do allow you to develop simple apps without writing code, it’s unlikely you’ll be able to develop a robust app – or any app with customized features – with these tools.

About Appy Pie

Appy Pie is a tool for creating mobile apps on all the major mobile operating systems (OSs), including Android, iOS and Windows Phone. It also allows users to monetize their apps with its own marketplace.

You can use Appy Pie to create forms, such as those that might be used in a simple survey or quiz and create an app with Appy Pie that links to these forms on an external source. However, you won’t be able to create complex forms, gather data or create statistics without additional development.

About ShoutEm

ShoutEm was originally a social app for mobile networks, although it’s now used to create mobile apps. You can use ShoutEm to develop apps with written content and multimedia files that allow users to select their favorite pages for quick access.

However, it won’t allow you to create in-app purchases, as is the case with some other app makers. You could get around this by creating a separate version for paying customers with additional content. Pages that allow users to input their own data would also not be possible with Shoutem.

About SwifTec

SwifTec is one of the most popular mobile app makers currently available and has helped to create over a million apps since 2010. Its customer loyalty features are some of SwifTec’s most distinctive characteristics.

These features can be a highly effective method of promoting discount coupons. You can use SwifTec to create an app for a store by integrating services from Etsy and Shopify or using a checkout feature from a payment service like PayPal.

However, you can’t create a composite seller app like eBay with SwiTec, as this capability would require a back-end that app makers can’t handle. One possible workaround to this limitation would be to create an app to host basic classified ads by using social post, although this approach wouldn’t enforce a consistent appearance for the posts.

Using Educational Tools To Build Your Own App

Learning how to build an app from scratch is something that’s possible, but it’s certainly a long-term approach to building an app. You’ll risk losing interest, someone else developing your app while you learn and many times you’ll still end up paying for part of the build even if you learn how to do part of it.

With that said, the most popular tools for teaching non-technical users how to program include Udemy, Codecademy and Udacity.

Udemy

Udemy is an online learning platform with over 10 million students currently enrolled. It offers more than 40,000 courses, which students primarily use to advance their careers or improve their personal education.

The biggest challenge with using Udemy for learning to program is that many of these courses are too short to provide the student with a solid background in the subject matter.

Most courses don’t have an assessment feature, and those that do have assessments use them inconsistently. Furthermore, Udemy courses aren’t regulated for consistency on pricing or quality.

Codecademy

Codecademy is an interactive platform that offers coding classes in many programming languages at no charge. These include many languages used in mobile apps such as Java, JavaScript, Python, Ruby and SQL in addition to markup languages like CSS and HTML.

Codecademy also offers additional features for a charge, including live support, a personalized learning plan and realistic projects. It offers a hands-on approach to programming, but fails to place these exercises within the context of creating a real-world project. Students can learn to write code with Codecademy, but they won’t be able to develop an independent app.

Udacity

Udacity offers massive open online courses (MOOCs) for a fee. It was originally created to provide university-style courses, although it’s currently best known for its vocational courses for professionals.

Cost is the greatest disadvantage of MOOCs like Udacity, which typically budgets about $200,000 to develop each of its courses. By comparison, universities only spend about $50,000 to build their online courses.

MOOCs must recoup these costs in the form of tuition, which makes them an expensive method of learning online. The high cost means that MOOC users are primarily large organizations that are already spending heavily on traditional training methods.

The Real Price Of Building An App For Free

Now you can see why, for most, building your own app for free will likely cost you more in the end. You also realize the folly of giving up equity for software development so early in the game. In order for your app to be truly worthwhile, it’s best to leverage a professional app developer to support you. The only question left is, “Are You Ready?”

[Take The Quiz To See If You’re Ready]